Inside the Bathroom

So I’m sorry if you follow me on social media too, because you’ll know that I haven’t stopped banging on about our new bathroom, but honestly I am so happy with how it’s turned out and that’s why I’m sharing it with you today (just so I can talk about it some more…).
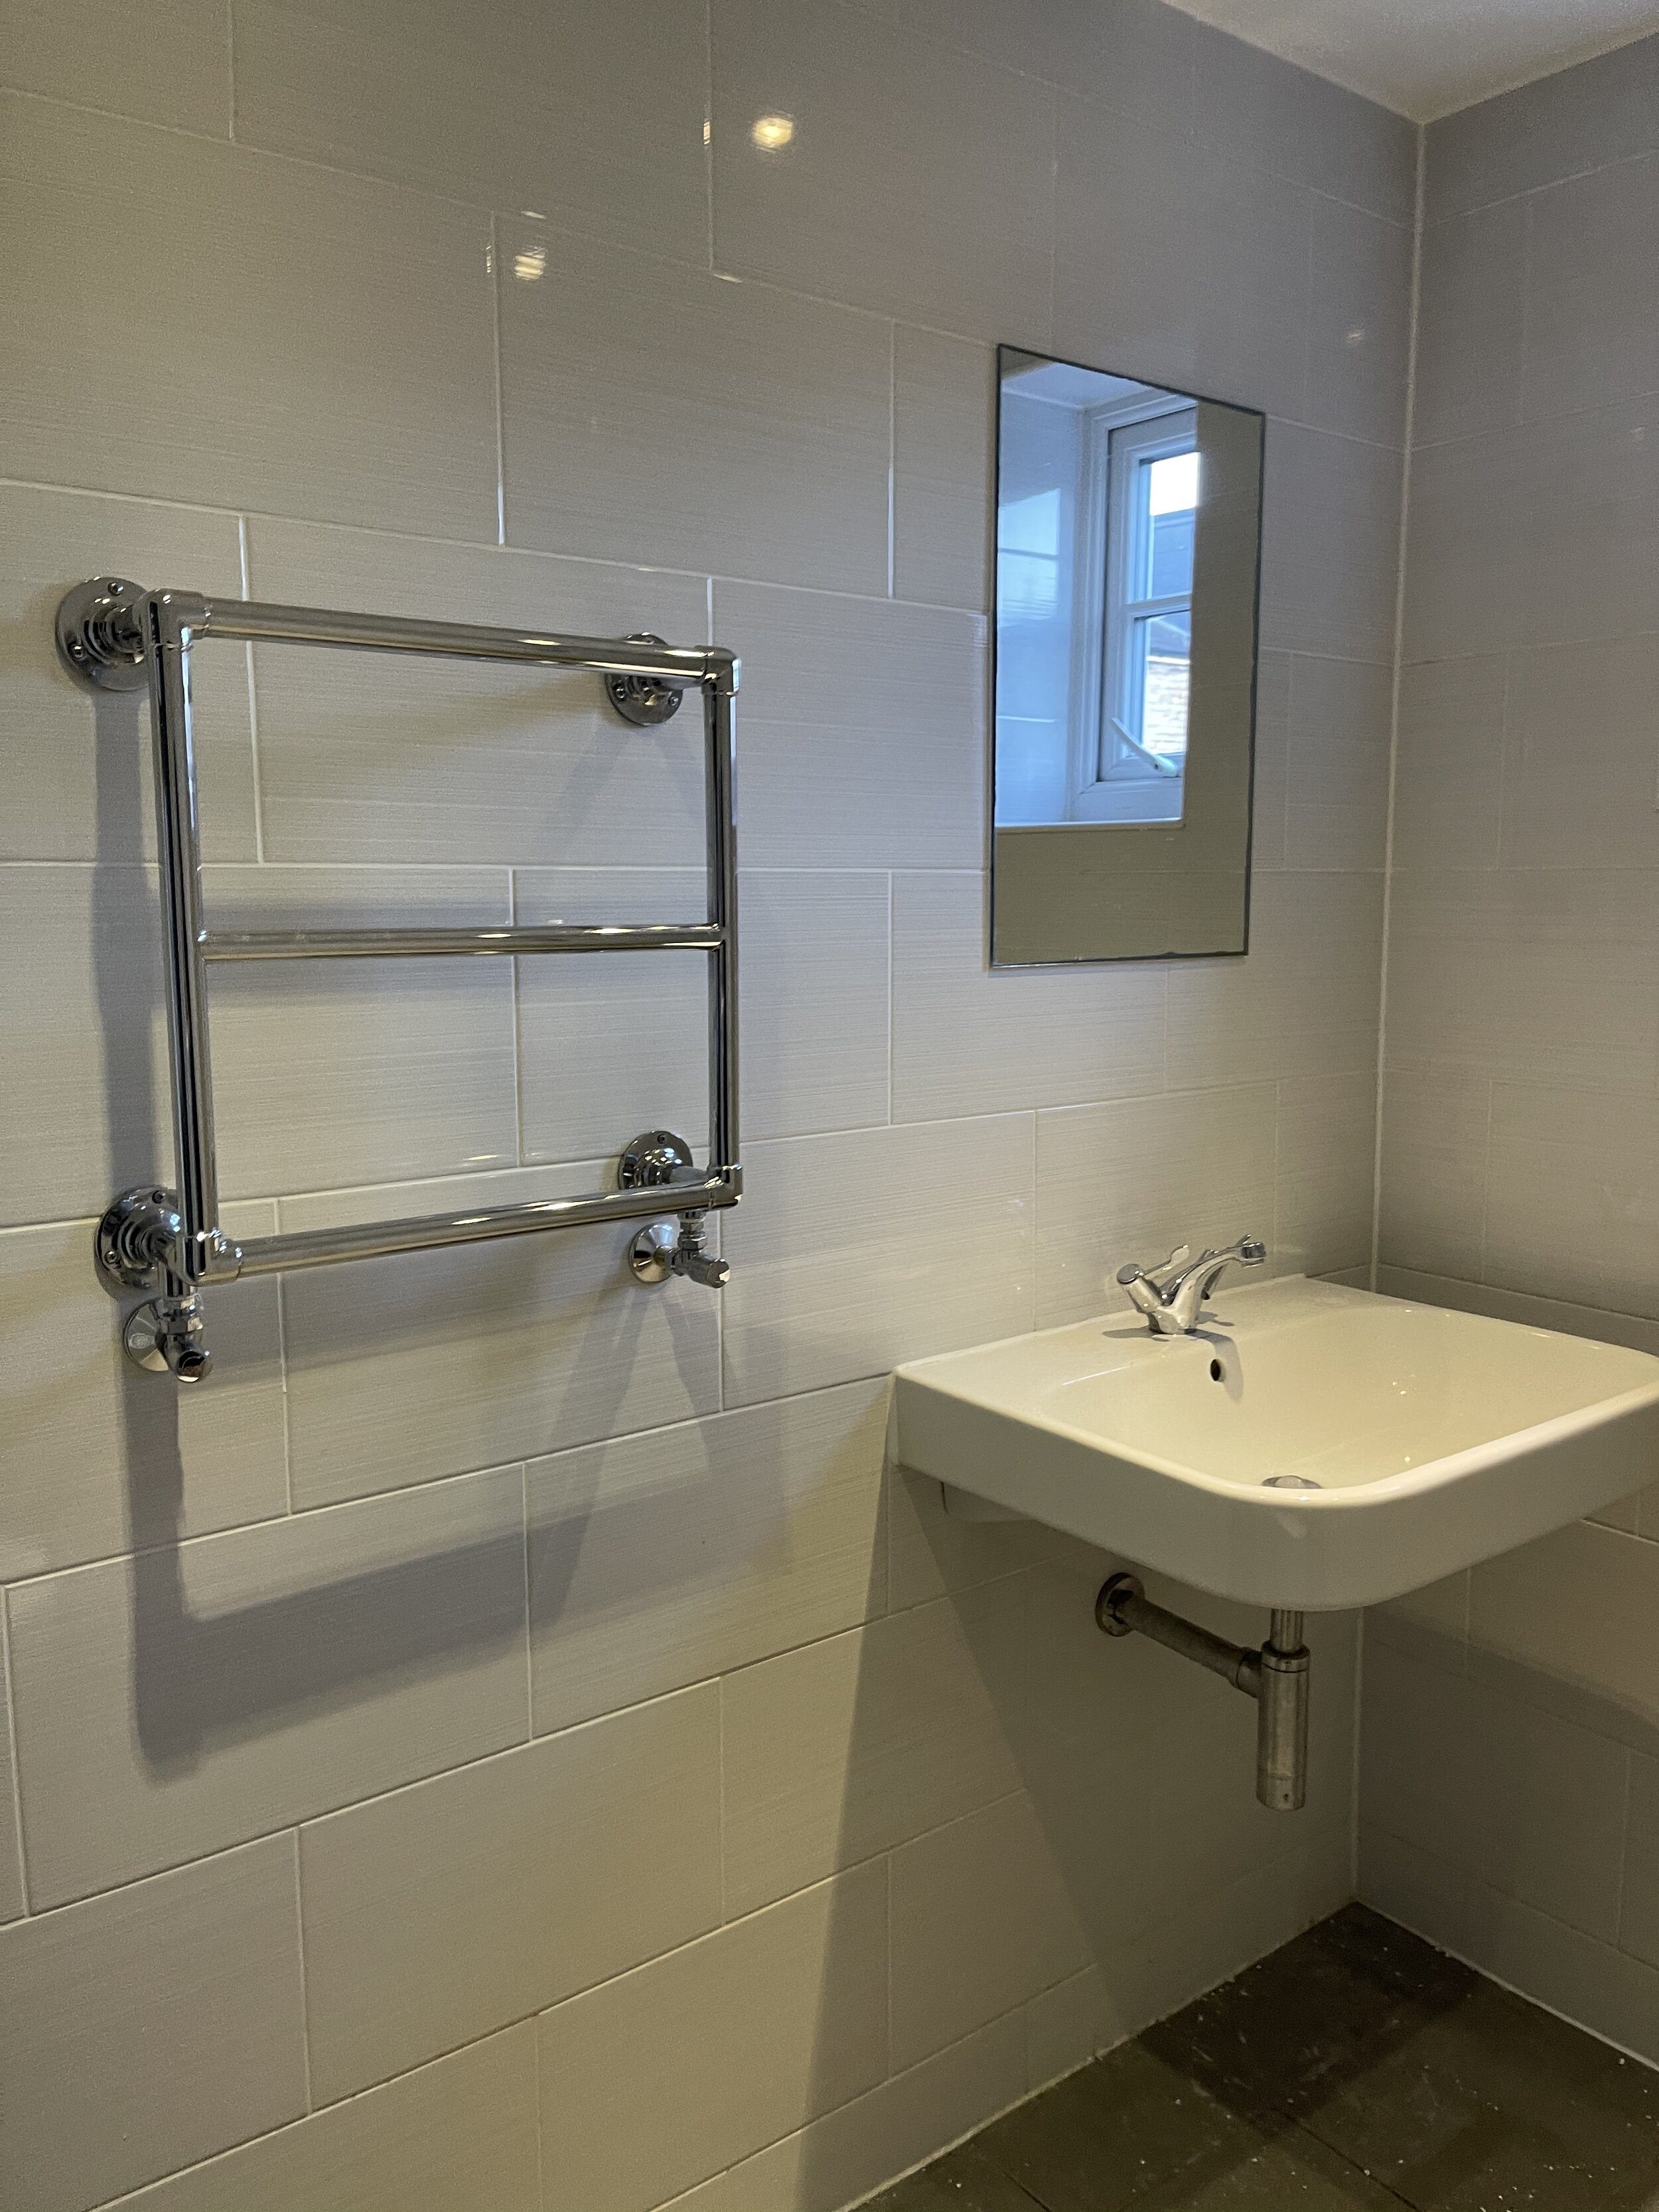
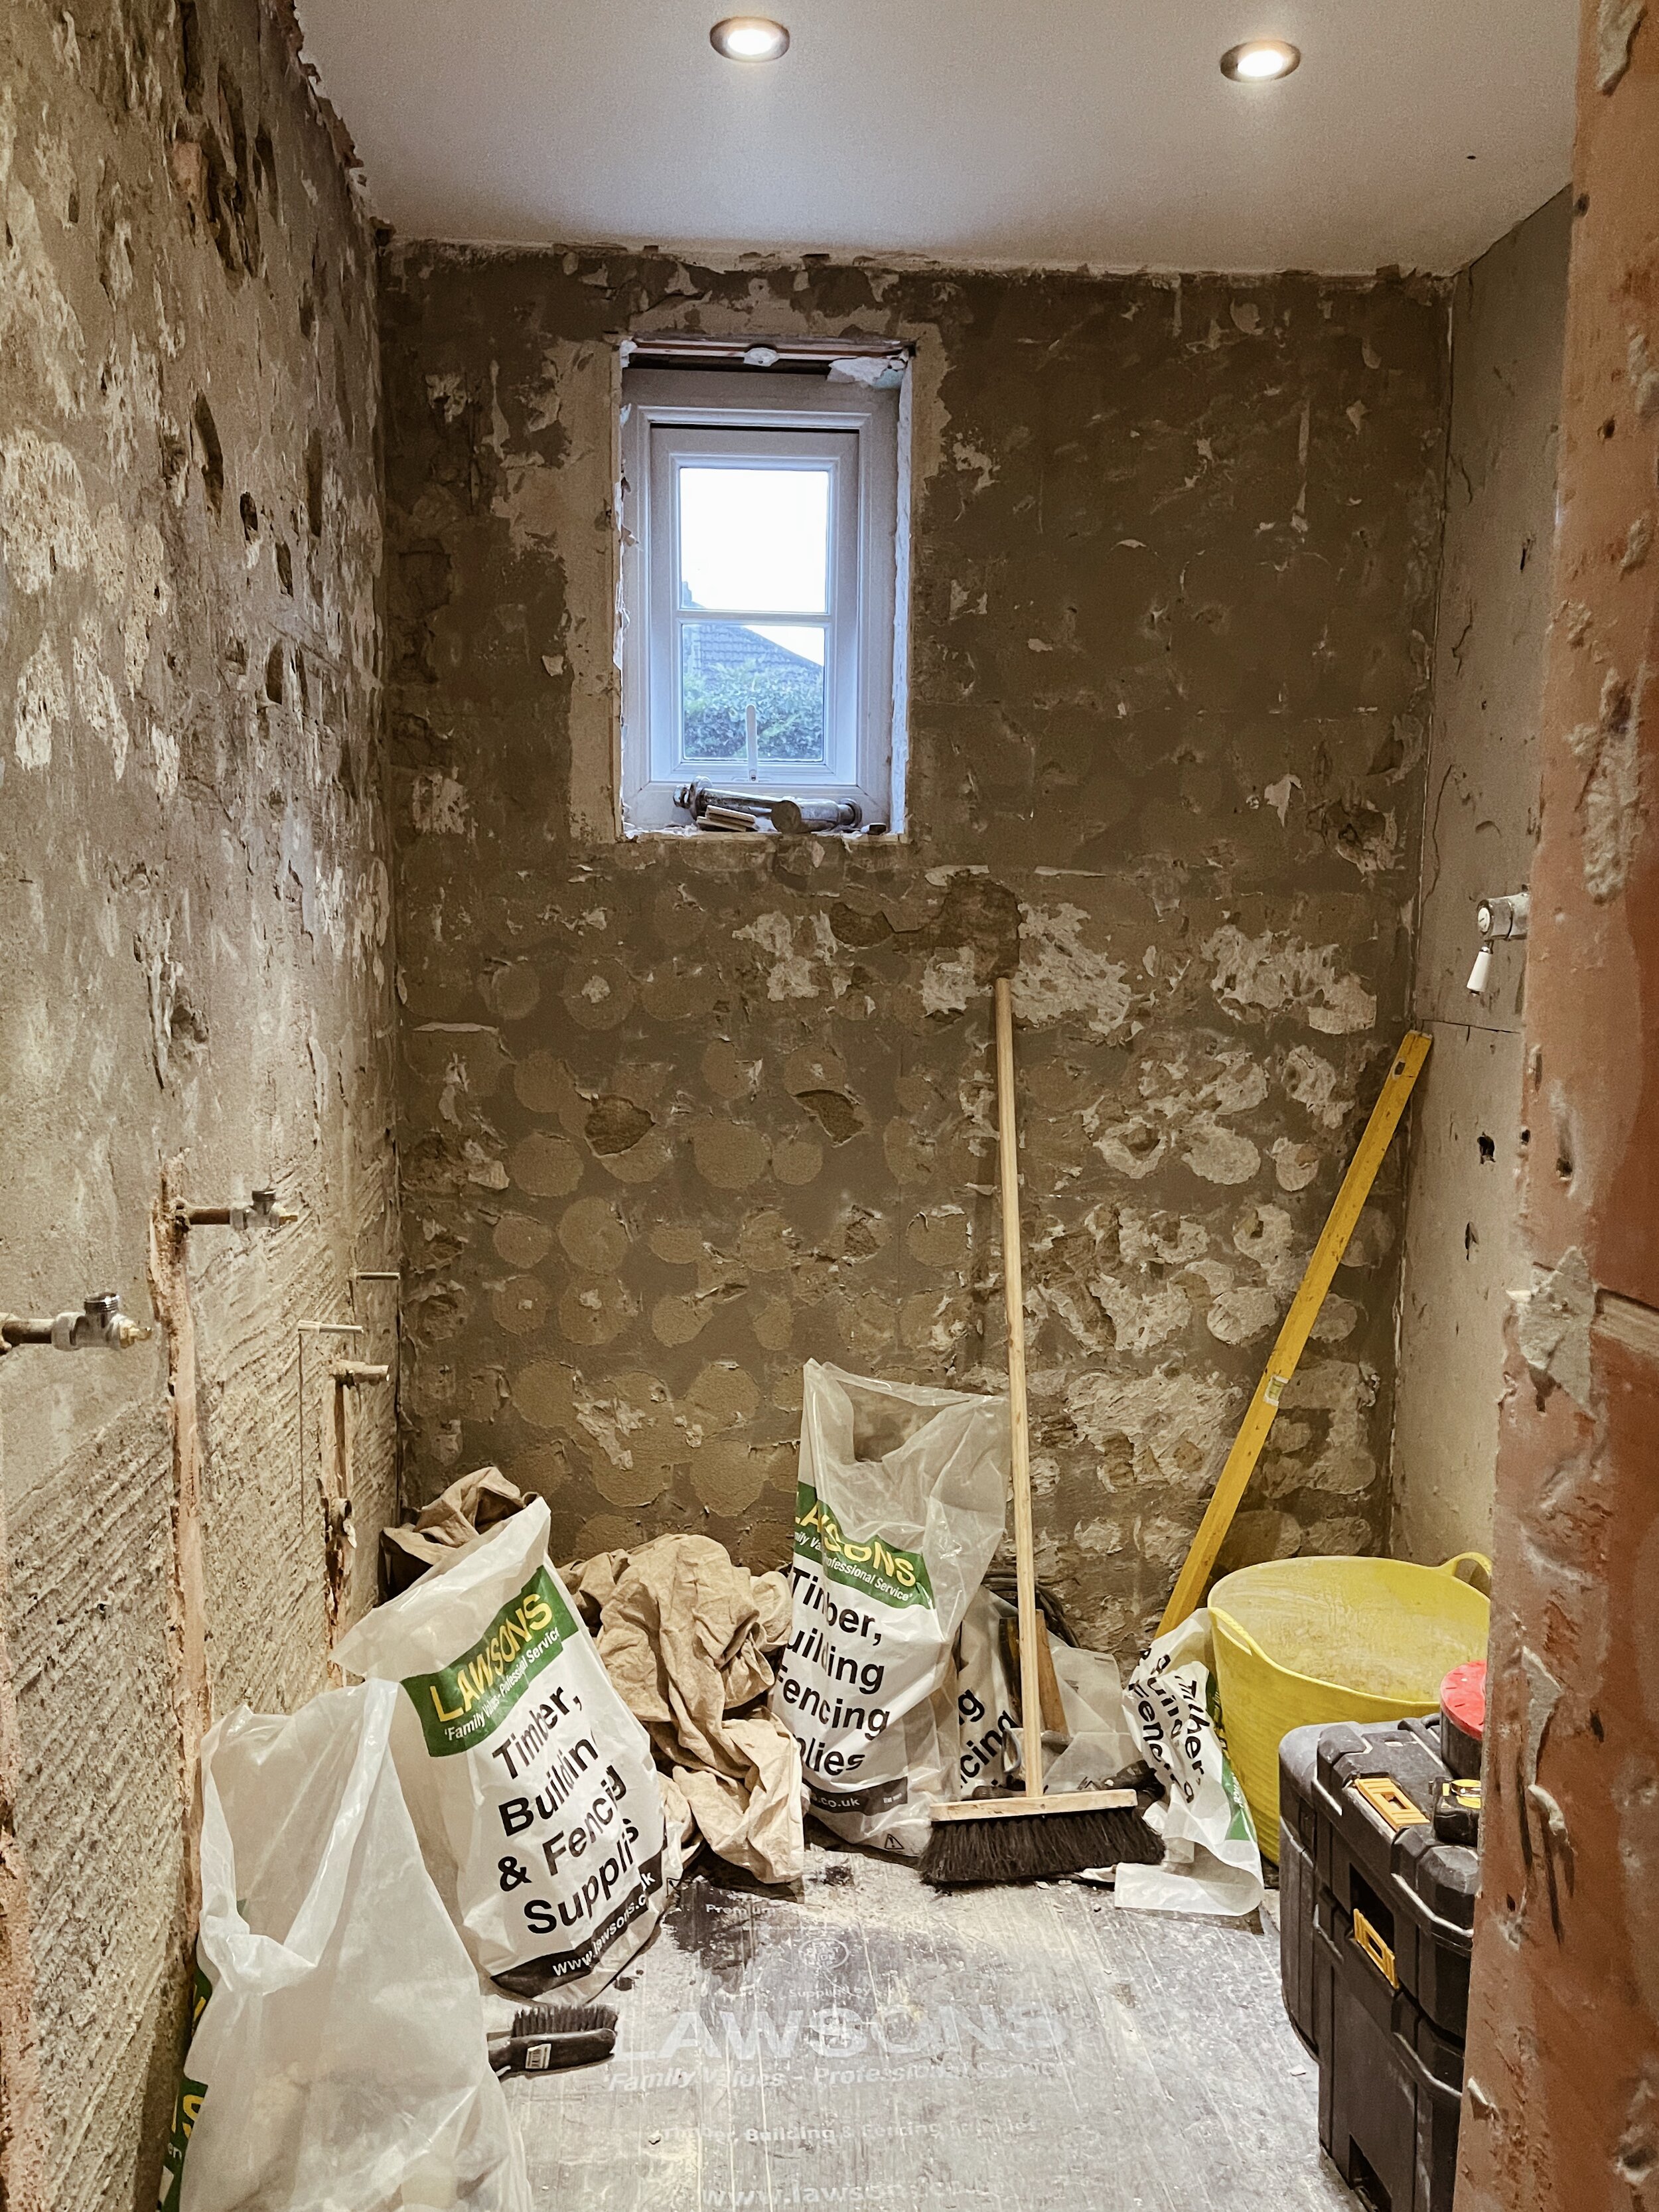
I actually realised why I’m borderline obsessed with it all, and it’s on realising that this is actually the first proper room that I’ve ever really taken apart and started from almost scratch. The previous owner actually had this bathroom for his four kids (they all lived in what is now our bedroom - I can’t even fathom the chaos!) so I guess it made sense for them to have just a wet room with as little hassle as possible, however with this being our main bathroom and what will eventually become the bathroom that guests use when popping over, the wet room style just wasn’t really cutting it. Like nobody wants wet feet when they pee right? And after Tim finally agreeing that it was a little annoying, and the bathroom did infact remind him of a sports changing room, we got to work on revamping it without a major pricetag.
Whilst the sink was one of the major issues in the fact it was huge and would have benefitted being on the back wall or even moved further down the side wall, we knew that moving the plumbing would cost us, so decided that we’d just work with it.
There was also the problem in that there was no storage - and although I wouldn’t exactly call myself a beauty and bath guru, I still like to have my face cleansers and hair stuff at arms reach whilst tucked away to give the illusion we’re a tidy household (I can confirm we’re not the greatest) so knew we needed more of a vanity unit as opposed to a floating sink.
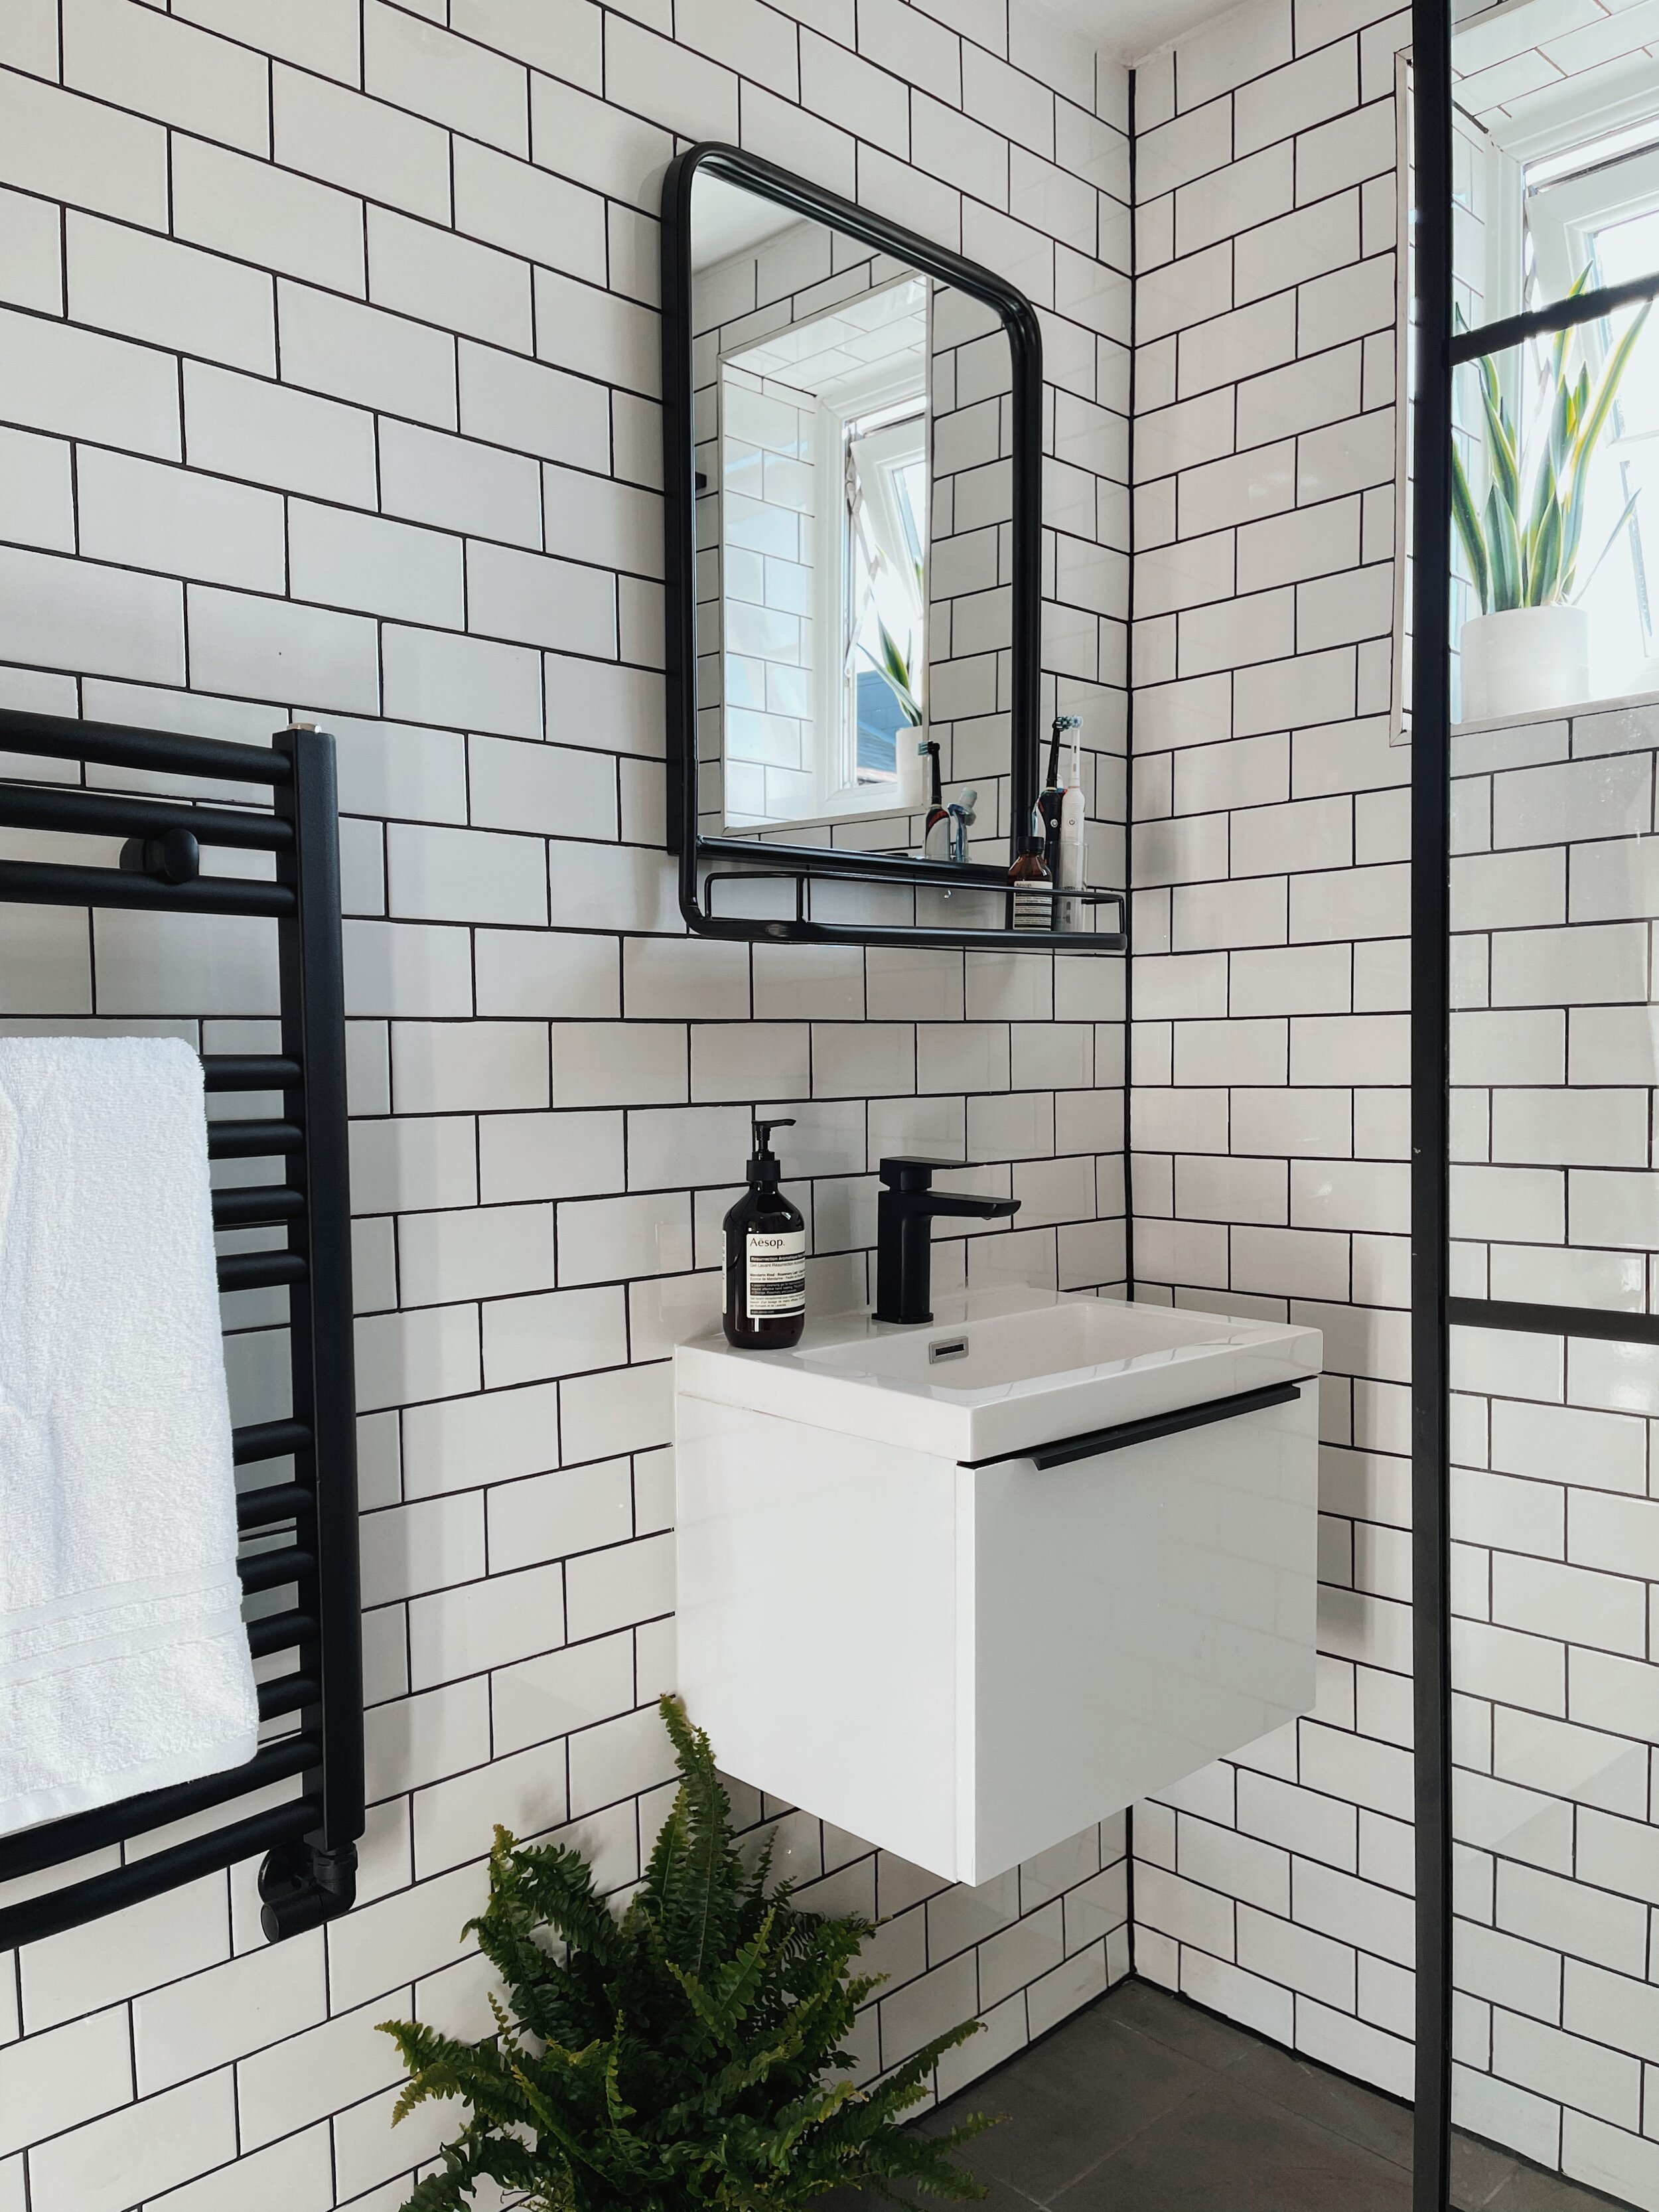
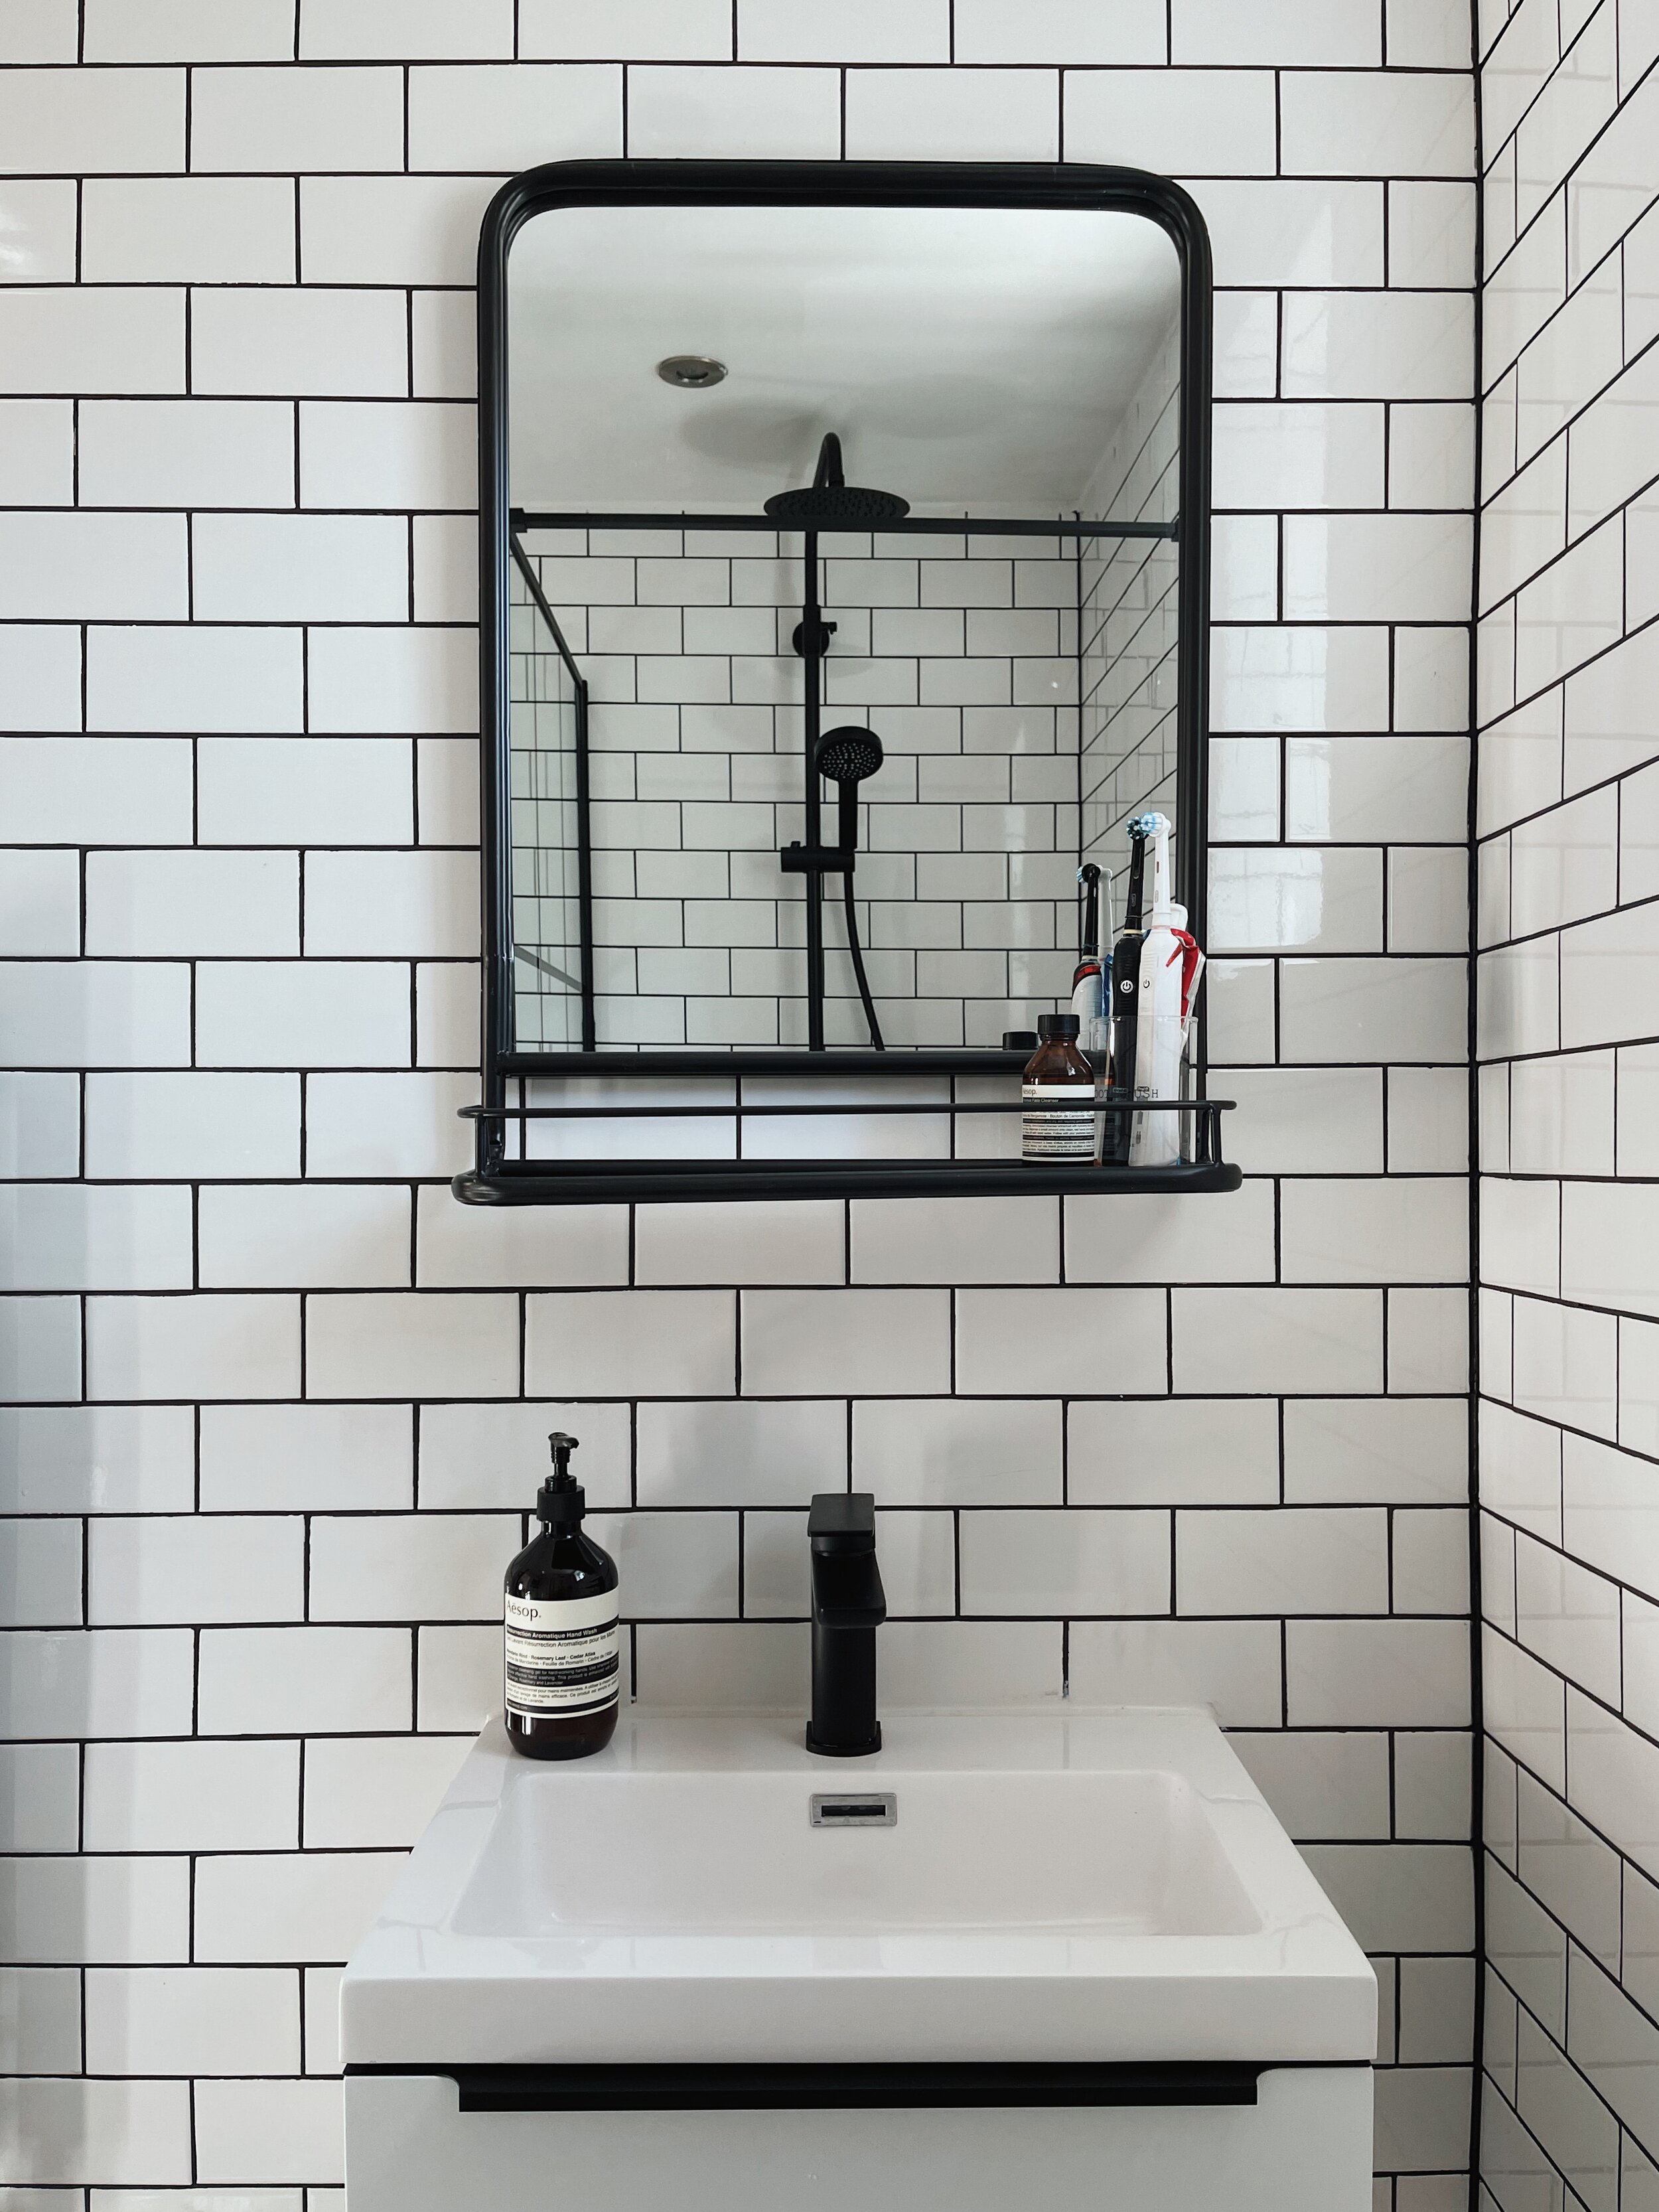
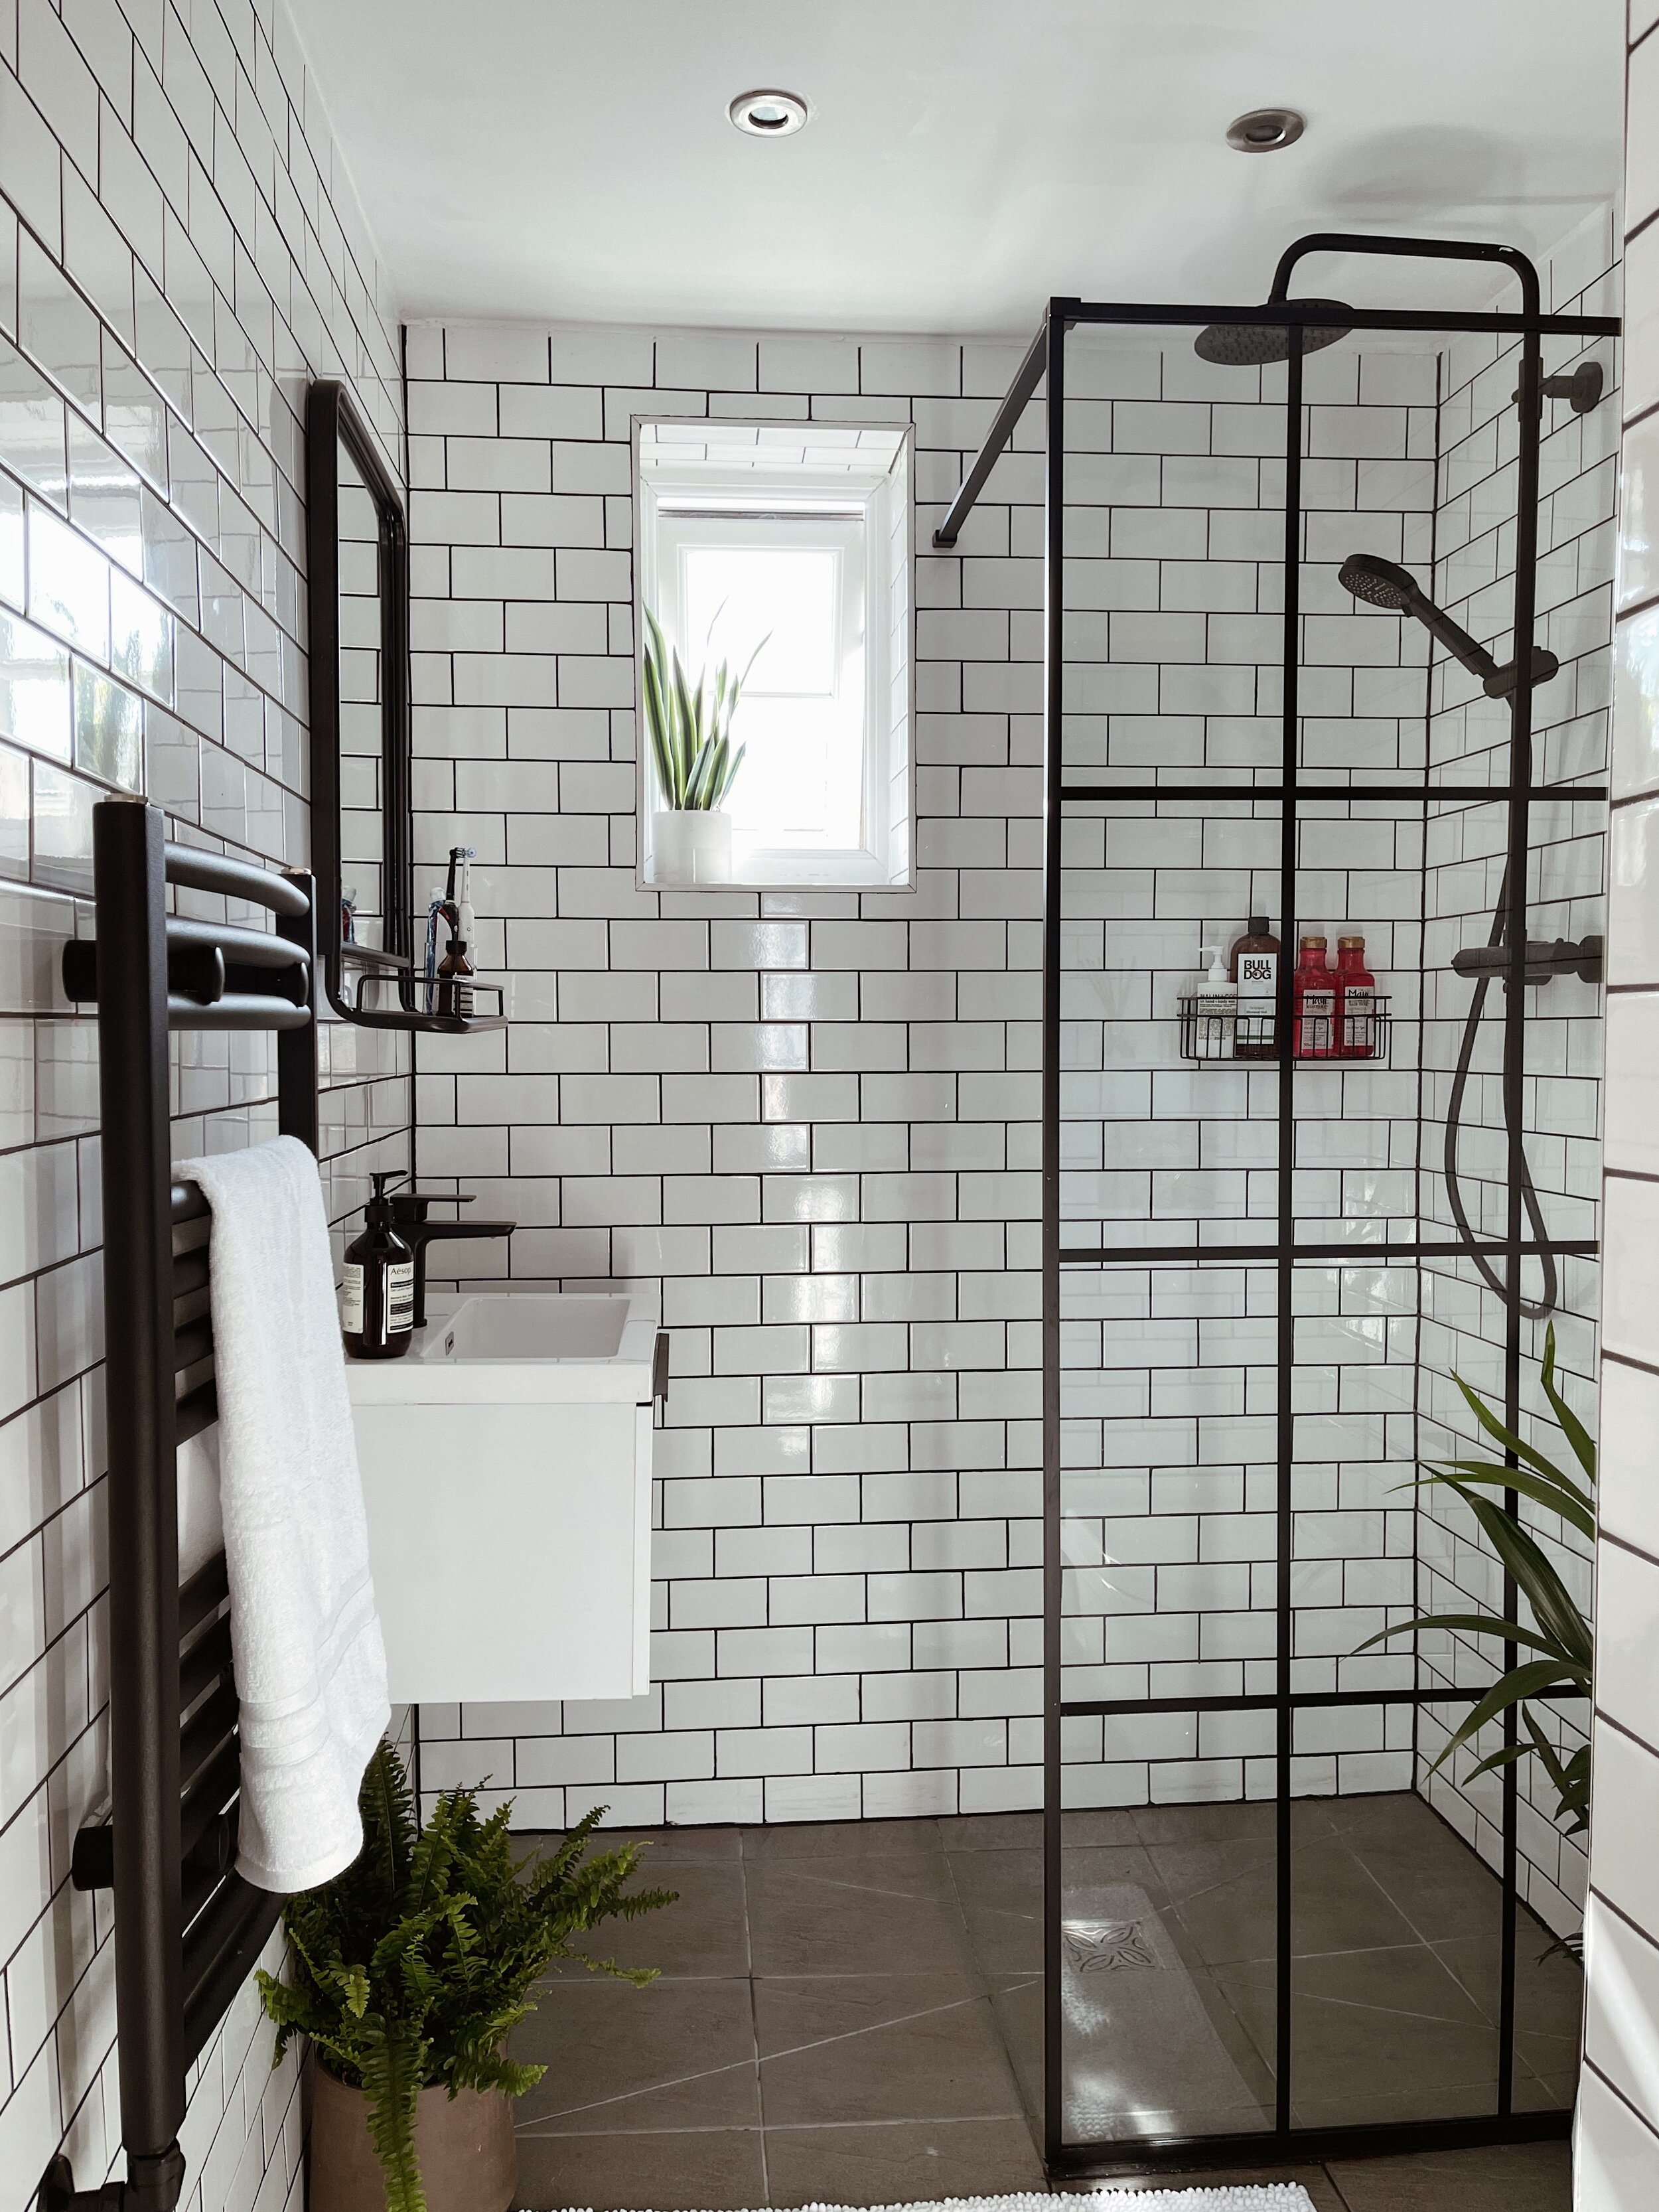
So we decided that we’d re-tile the whole room with a classic subway tile (after all, you just can’t go wrong with them can you?) which we picked from Porcelain Superstore. We debated plastering a bit of the wall and painting it instead of it feeling heavy on the tiles but as it was still essentially a wet room, it just felt easier and faff free to order enough tiles to cover it all. We kept the flooring tiles as they were as the previous owner had made one fair choice in that he’d popped under floor heating in this room, which then felt silly for us to rip up and redo. Plus with the choice of wall grout we opted for and a whole bottle of white wine vinegar poured over them to descale them (don’t even ask…), the floor thankfully fits in quite nicely!
As you can probably sense, it feels very Hoxton Paris - and that’s kind of the vibe we were after. Classic black tiles with matt black fixtures. We knew that in order to contain the water, we’d invest in a shower screen and went for the Victorian Plumbing Matt Black 800m one that was just enough to keep a good gap between that and the vanity unit for washing hands. After much back and forth and a whole lot of measuring, we opted for a floating vanity unit in the way of Drench’s Harbour Status. The old sink measured really big so we were mindful to get something smaller without it being too small that it reminded me of those sinks you get in under-the-stairs bathrooms. And whilst on Drench we also ordered the Harbour Matt Black Mixer Tap and Vellamo Twist Shower Package.
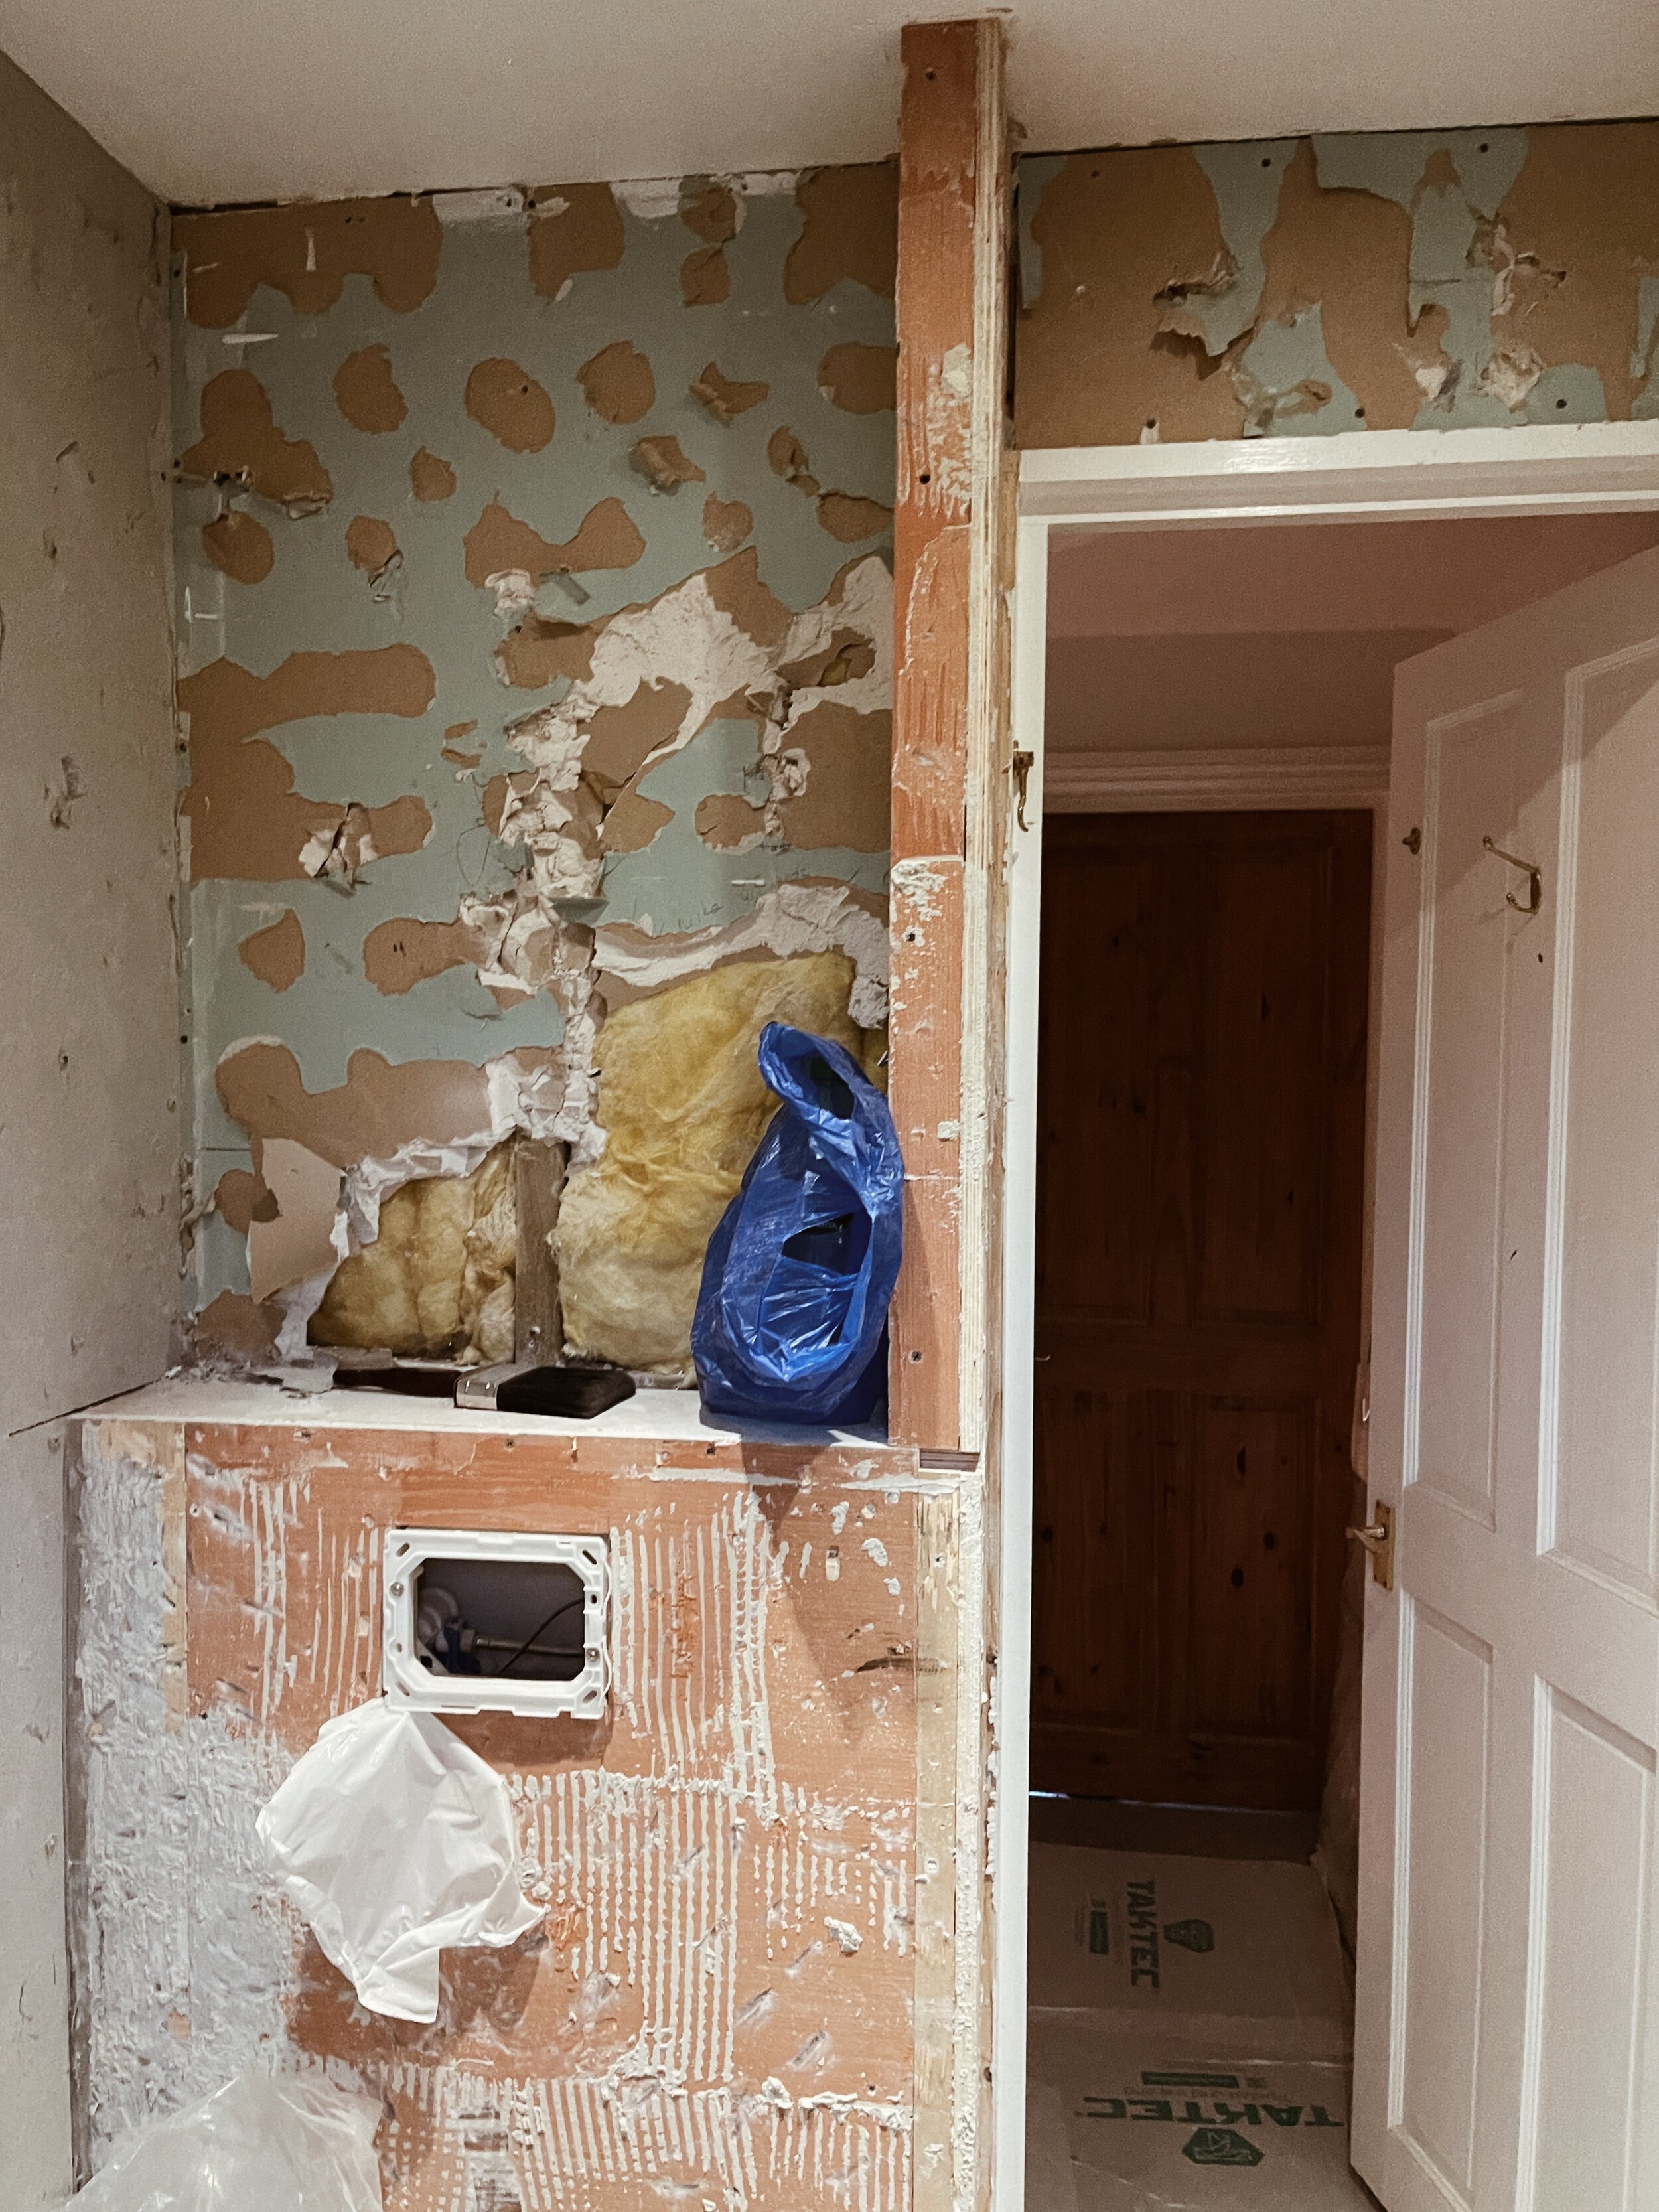
At that point, we hadn’t factored in a new radiator as it seemed to measure up a bit peculiar and was higher up on the wall than we liked. However once all the tiles as fixtures were removed, our workmen were incredibly kind and offered to move the radiator plumbing further down a little wider so that we could order more of a working towel rail - which was actually music to my ears, and a decision I’m so pleased we changed on in the end.
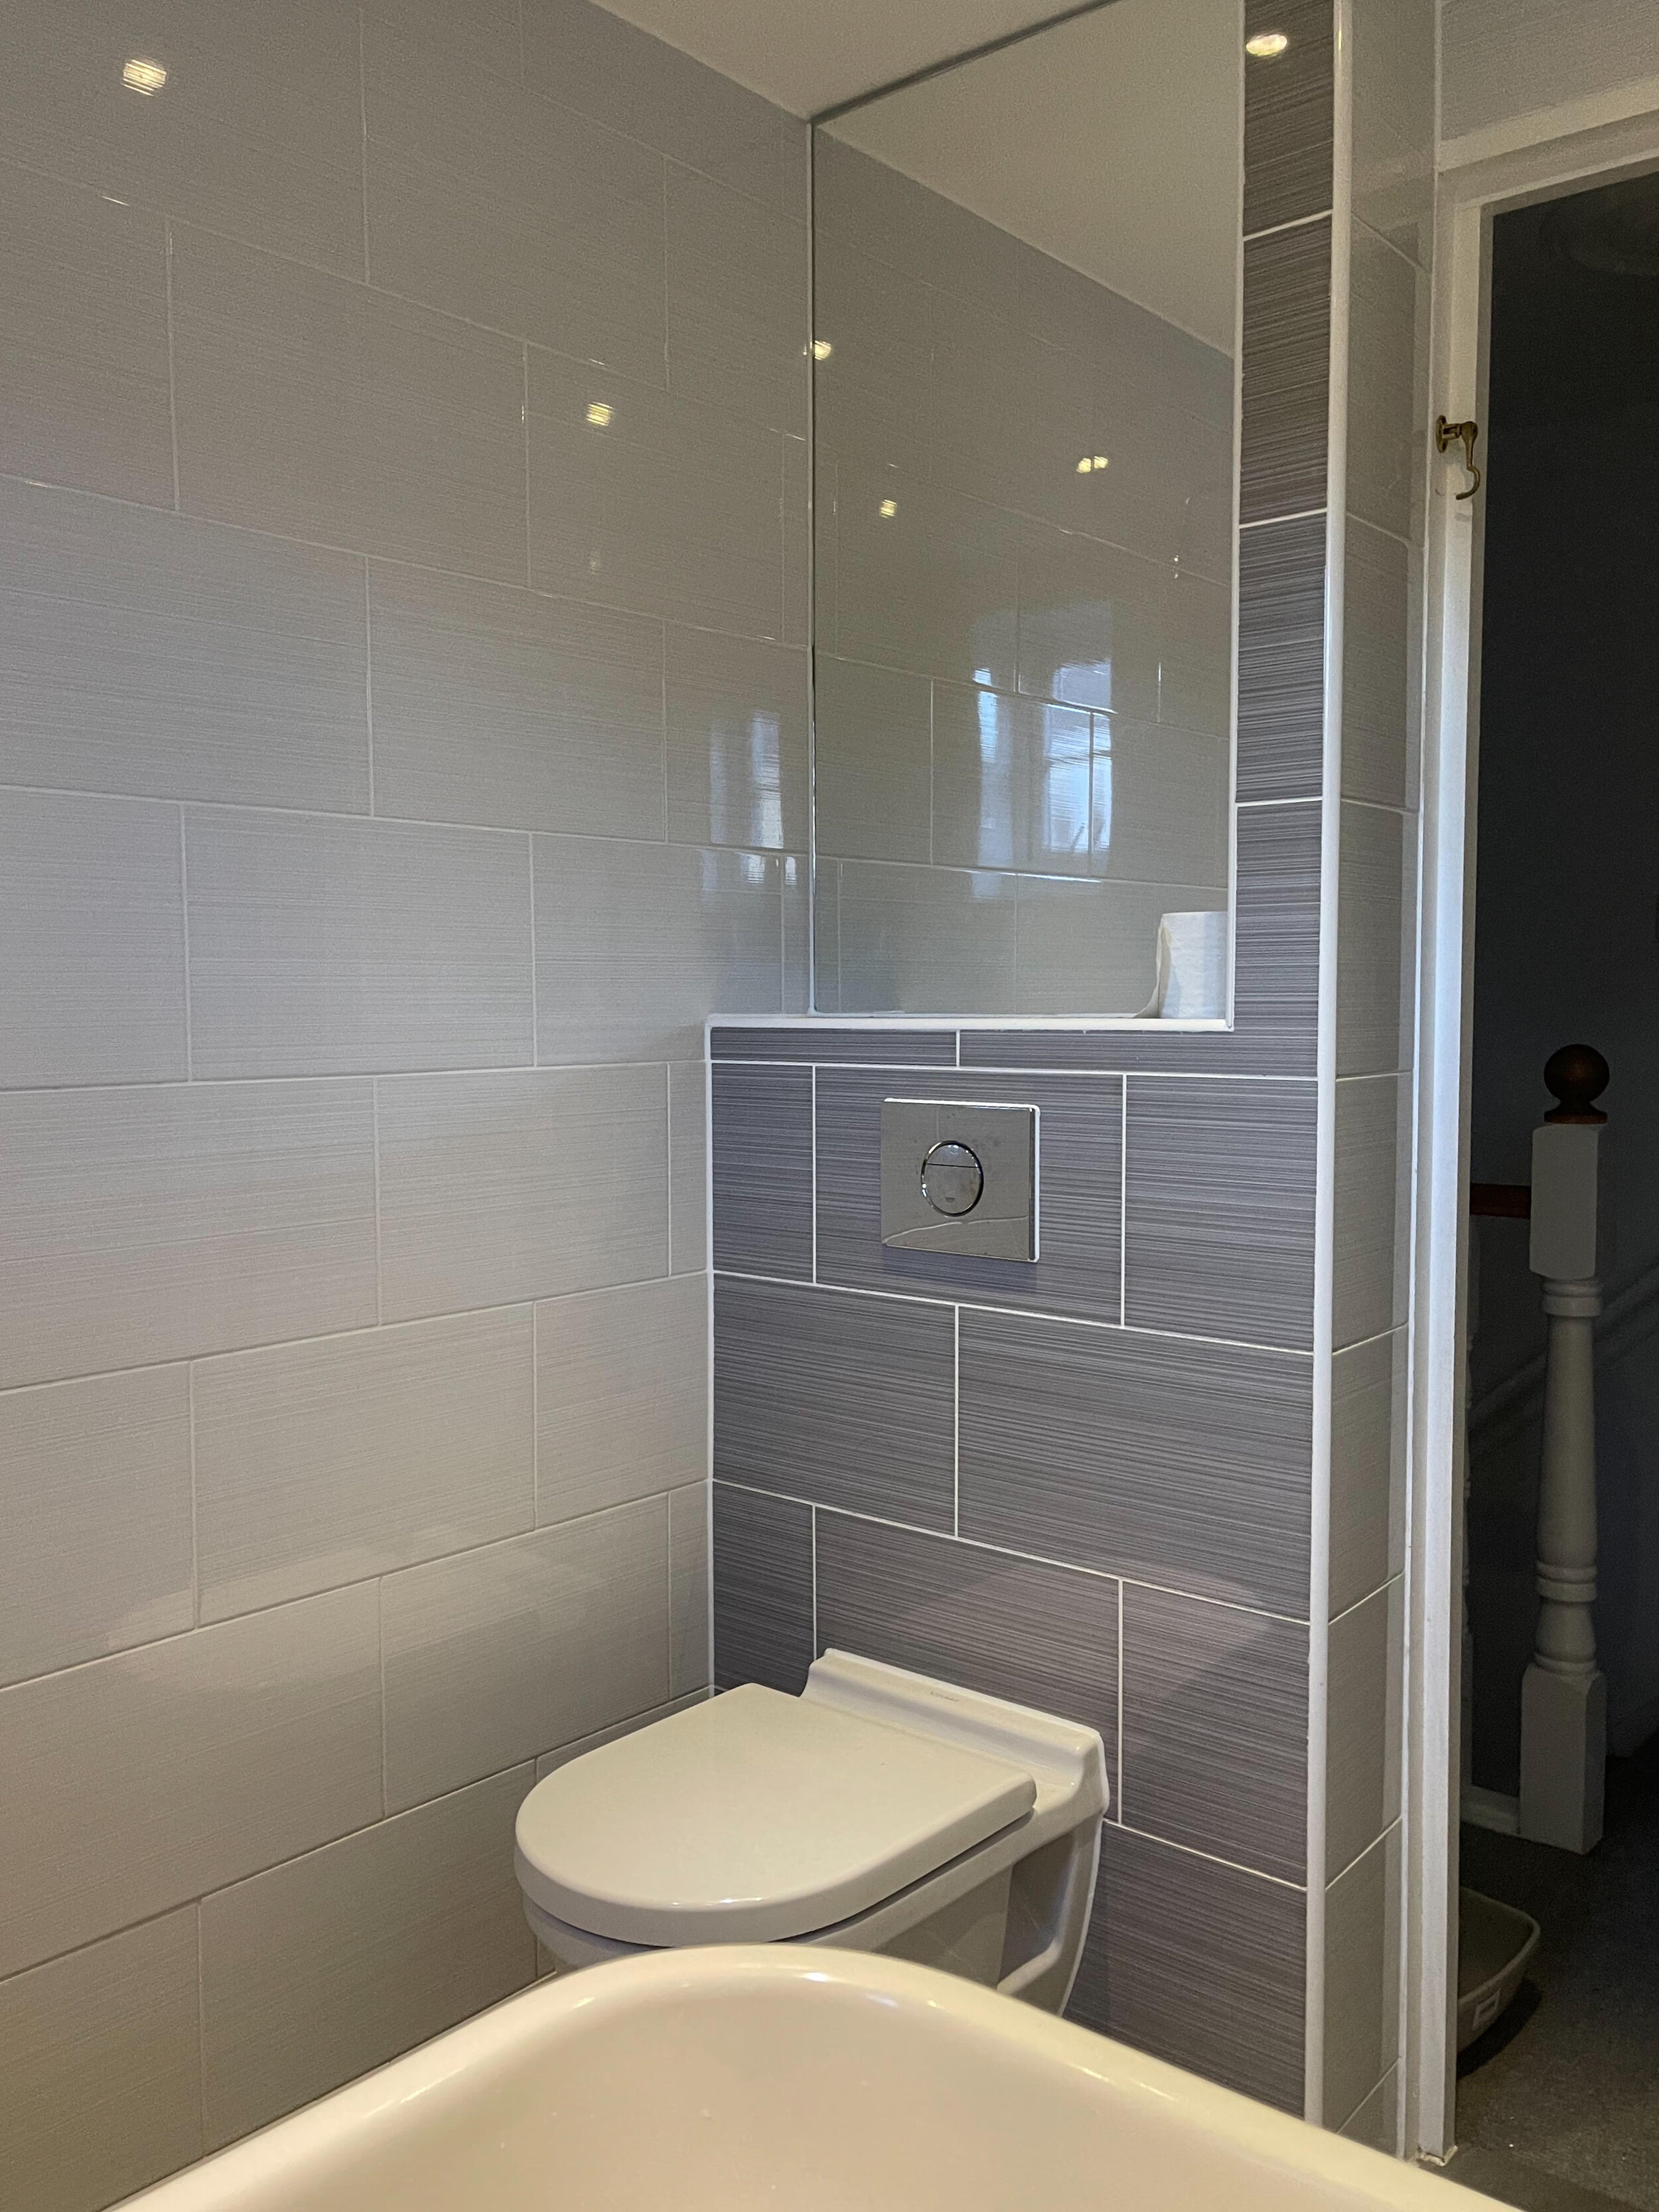
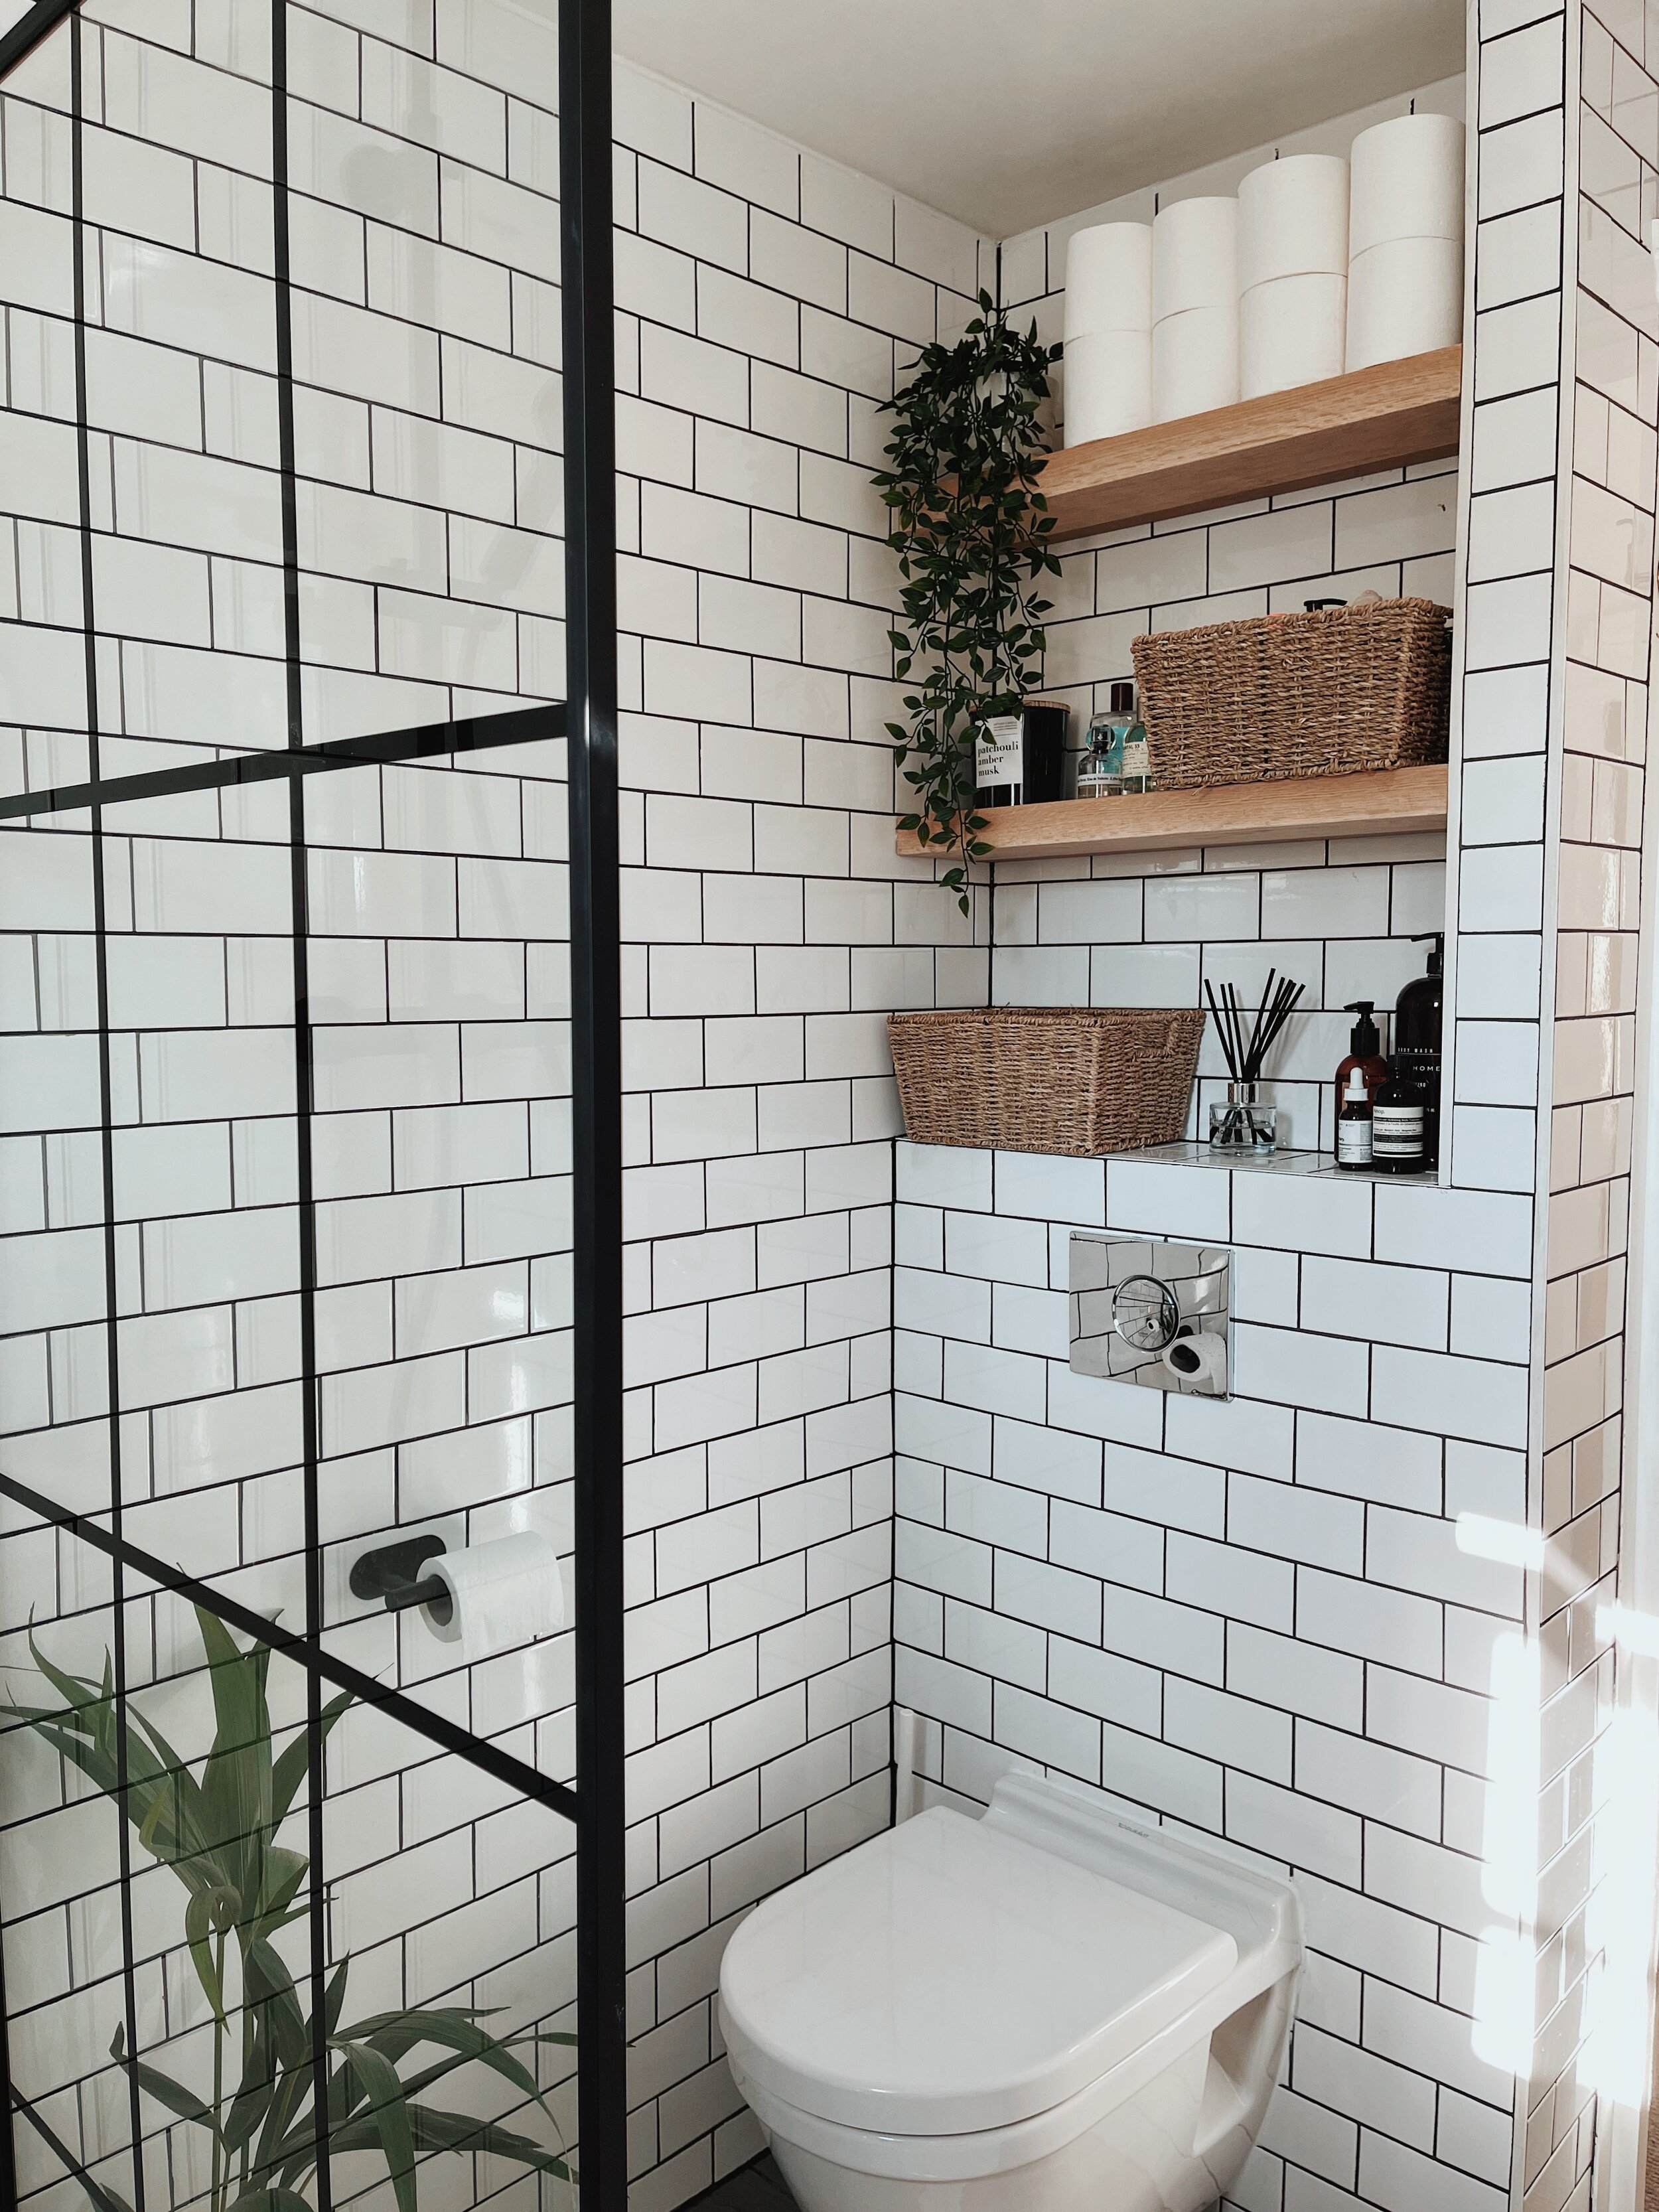
The toilet we ended up keeping as it was, because I don’t know about you, but built in cisterns are also a faff, and whilst we weren’t physically doing the bathroom ourselves it just seemed to be a minefield knowing what you’d need/what you don’t need etc. And instead I came home one afternoon with a whole stash of Dr Beckmann’s toilet cleaning foam, blitzed the exterior with Method and it almost feels like a new toilet. Faff free and saving where we can - it’s a win win!
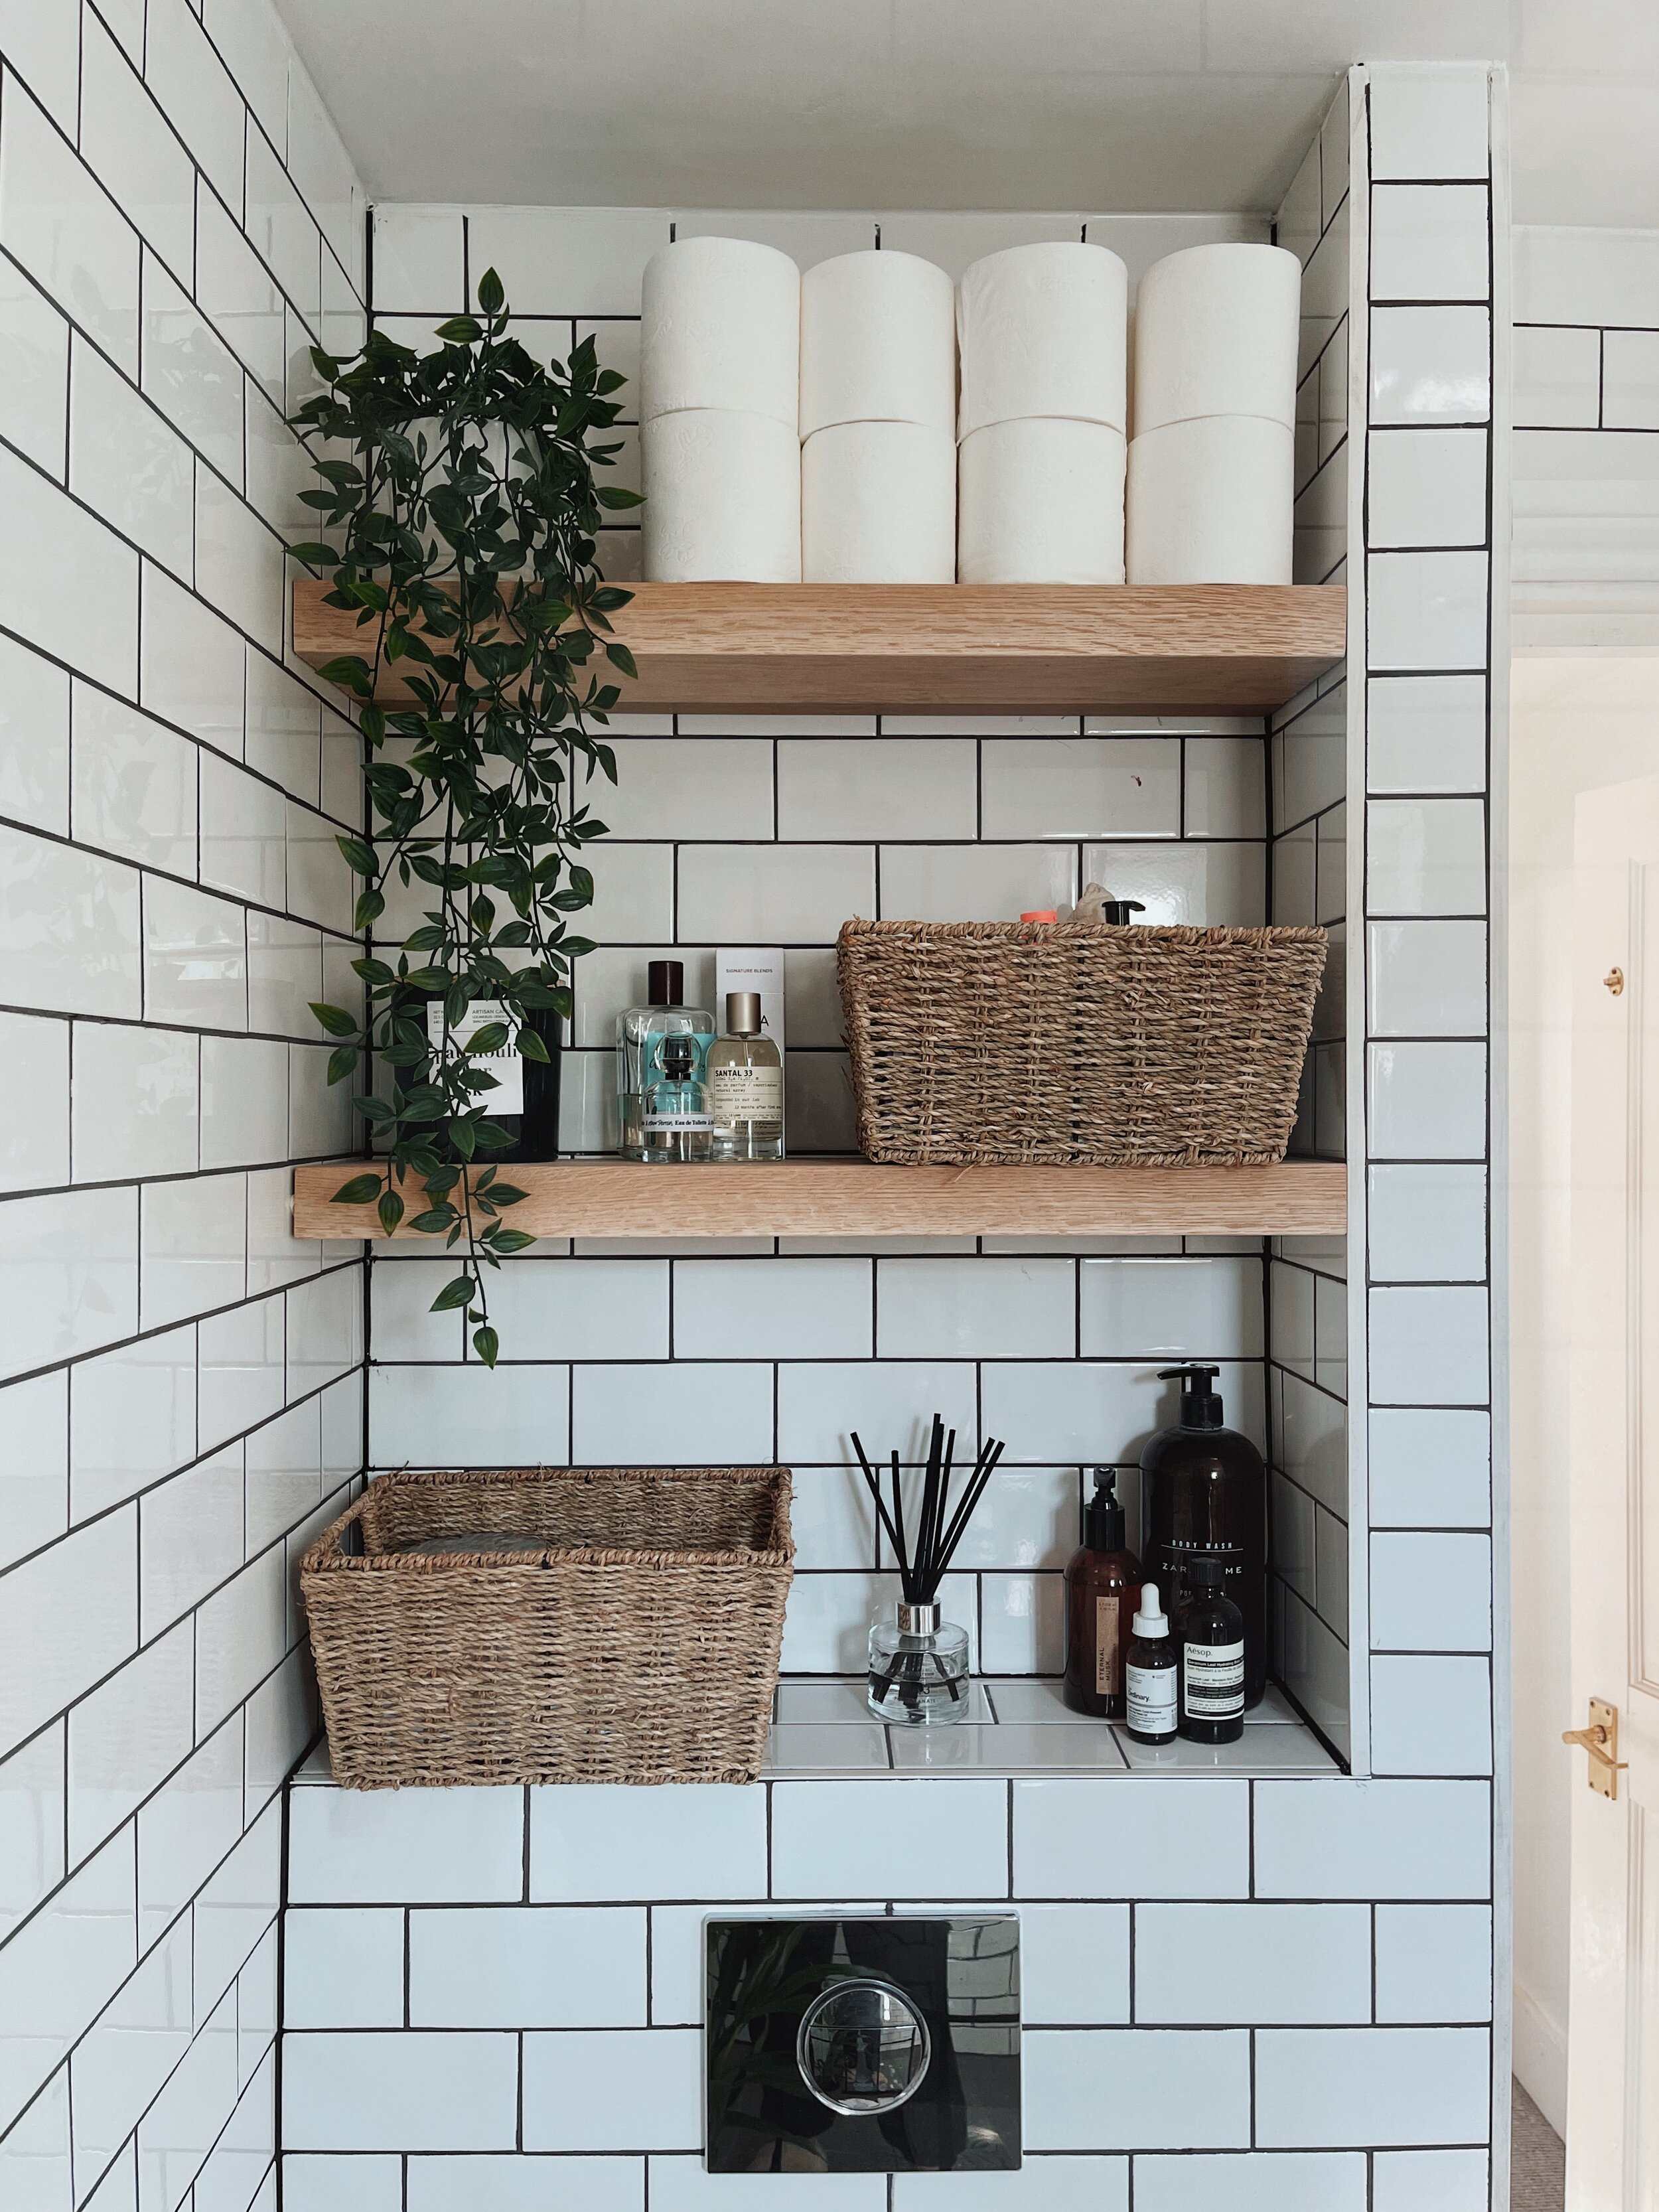
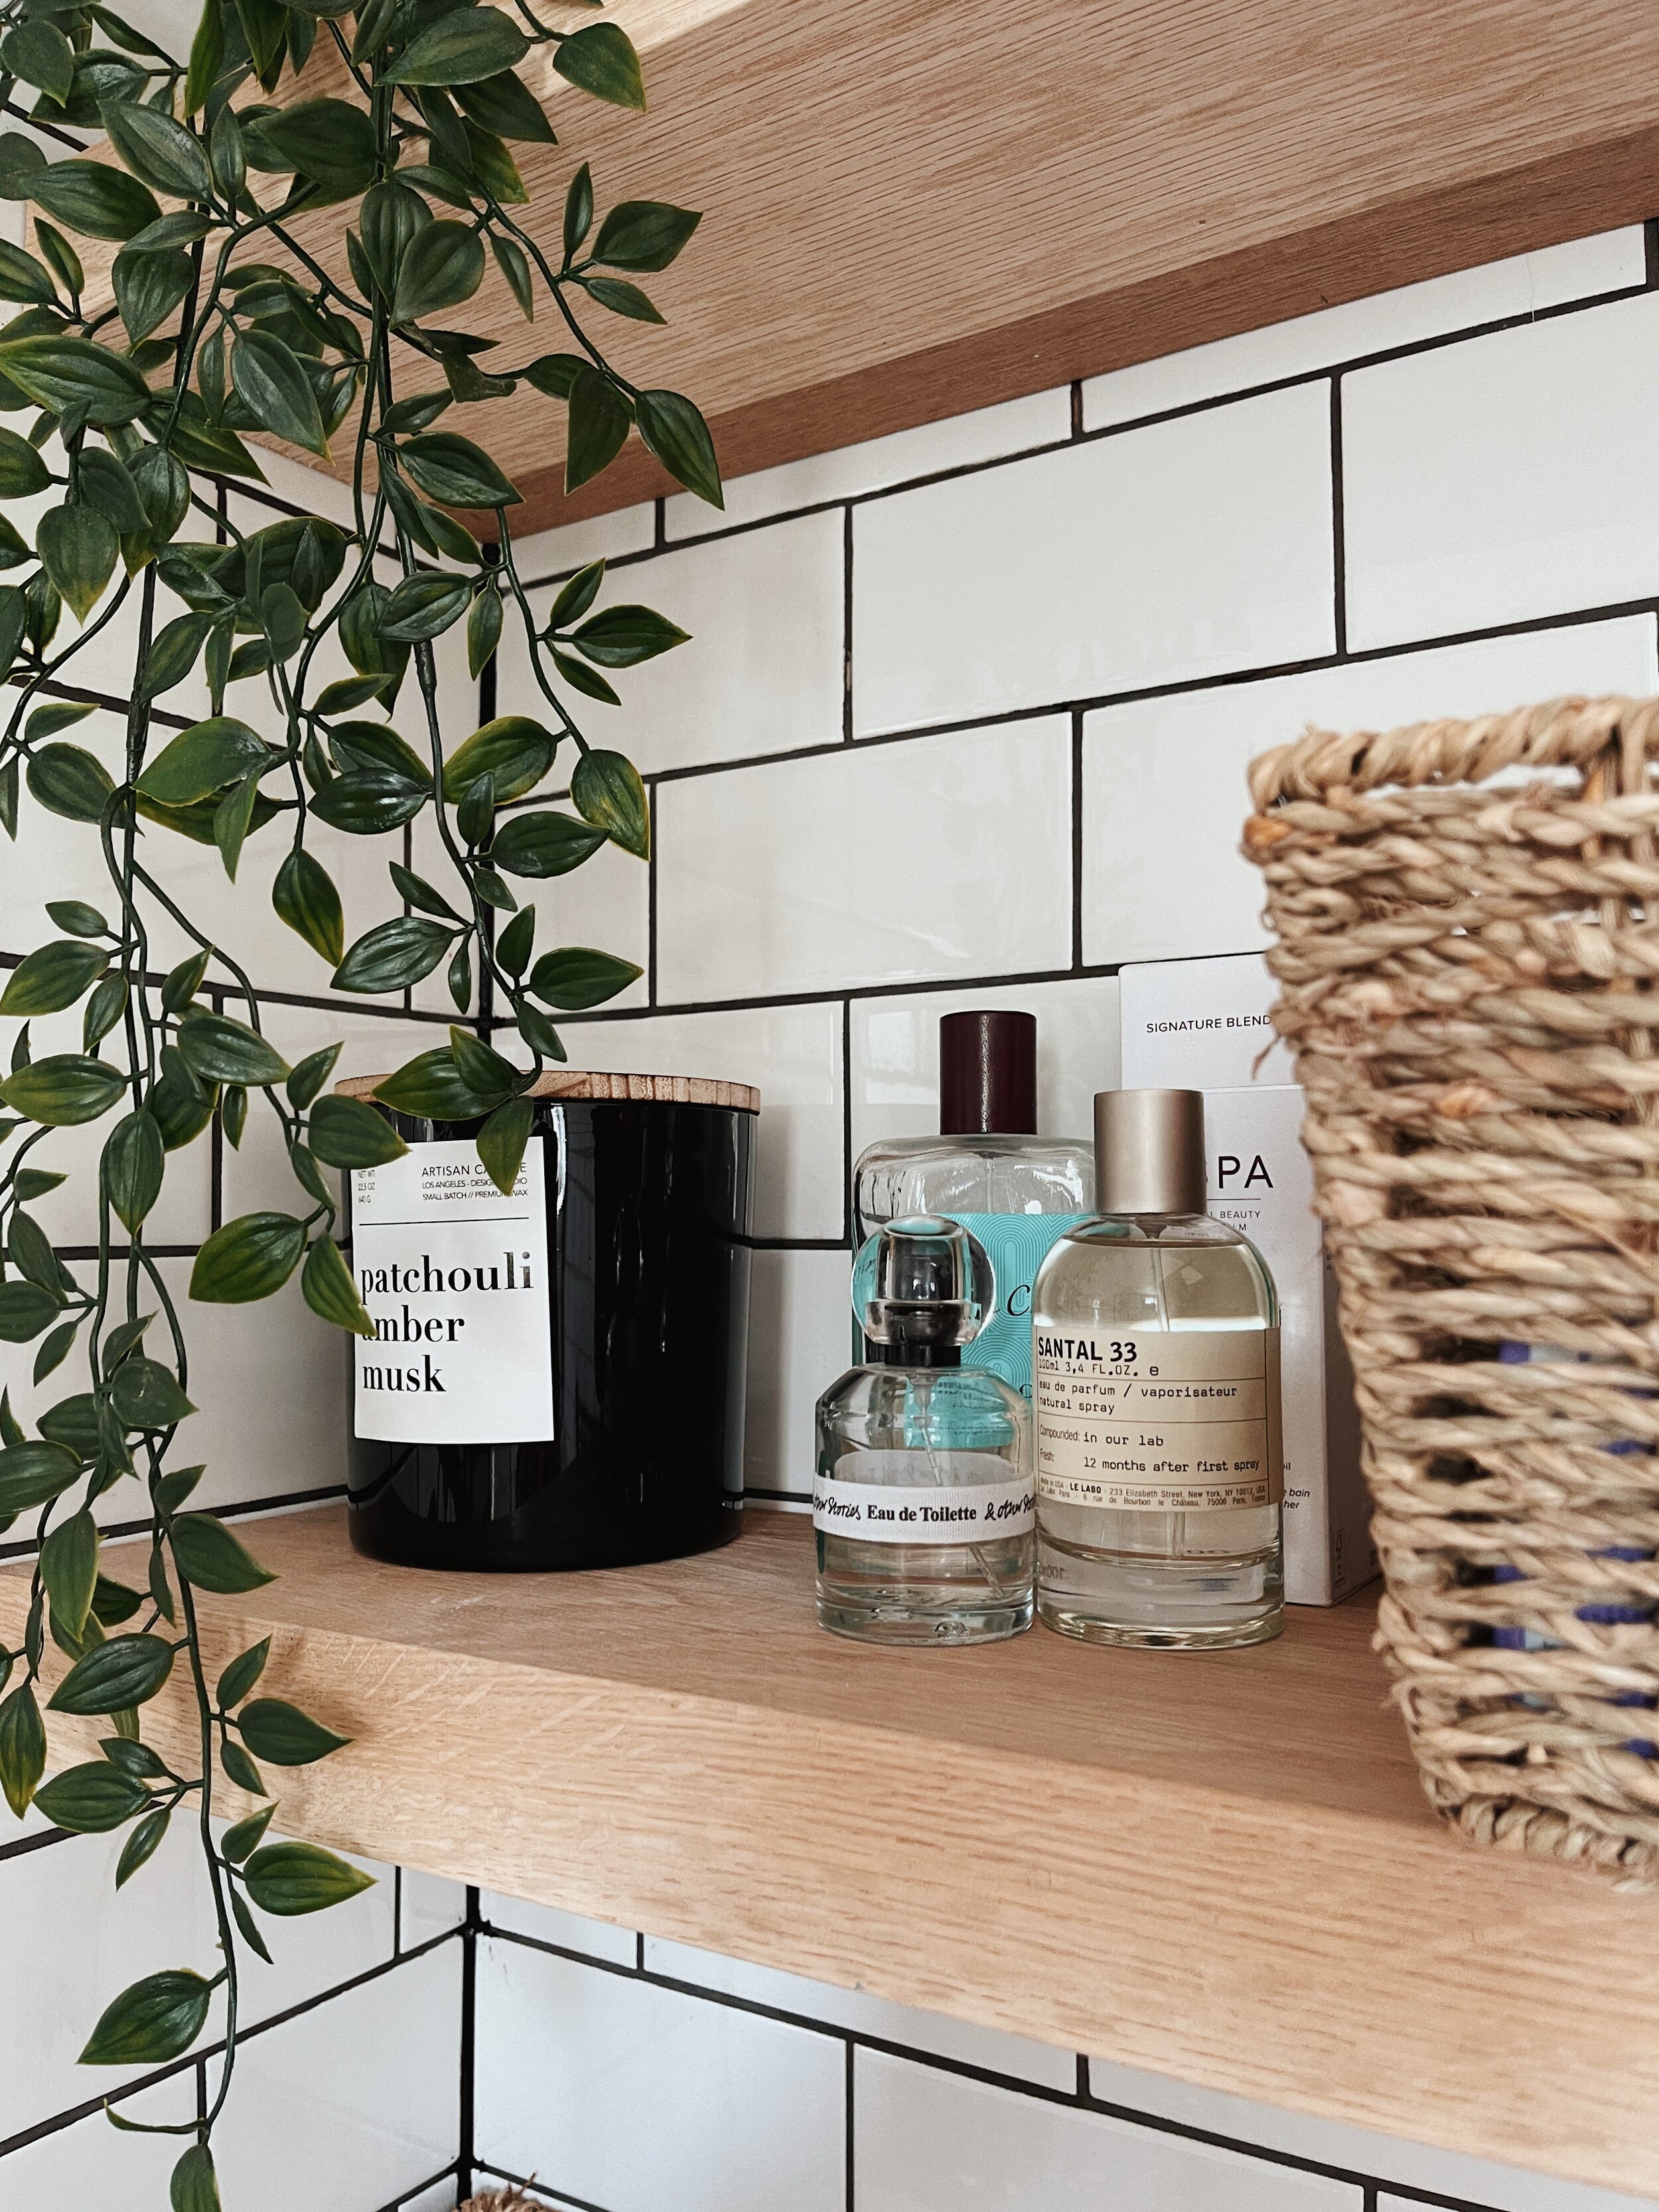
I was also conscious of using the space behind the toilet wisely. There’d originally been a mirror in place with a small lip to cover the toilet cistern, and it’s where we kept our things from getting wet. It wasn’t practical, so I wanted to make it practical without knocking it all down. I spoke to our workmen on the idea of adding two open wood shelves because for us, it wasn’t like we needed endless cupboard and storage space, we just wanted something that felt more whilst also making it a nice bathroom. The workmen turned up on the last day with some solid oak wood that they’d put together to create floating shelves and at first I was adamant we’d stain them a darker wood, however after popping on some toiletries and a few seagrass baskets, I've hugely warmed to the oak colour and think it’s drastically changed the space.
The baskets keep all the odd bits and bobs in some form of organisation, whilst also looking pretty on the shelf, and then of course the other bottles are definitely more decorative but also the ones I use on the regular. And there’s much more space to store our toilet roll without them being left down the side of the toilet looking a little sorry for themselves. And with life in a pandemic still very much real, toilet roll sure goes down a lot quicker in this house…
ITEMS FEATURED
Elements White Subway Tiles - Porcelain Superstore (Press Discount)
Arezzo Matt Black Wetroom Screen - Victorian Plumbing
Harbour Status Wall Hung Vanity Unit - Drench
Harbour Status Matt Black Basin Tap & Mixer- Drench
Vellamo Twist Matt Black Shower Package - Drench
Large Industrial Mirror - Rose & Grey Interiors
Reina Curved Heated Towel Rail - Drench
Handsoap - Aesop
Toothbrush Tumbler - Zara
Seagrass Baskets - Amazon
Artificial Snake Plant - Matalan
Black Shower Caddy - Matalan
Bath Mat & Towels - Next
One of my favourite things about the bathroom is the mirror! I spotted it one day whilst aimlessly scrolling, and knew that it would make the perfect addition to this revamp. It’s a great size and I liked the additional shelf so it kept the sink quite minimal without having too much on show.
So I think this took about a week overall to do, as the tiles ended up taking a little longer than expected cause of their smaller size and it being in the whole room. We’re incredibly pleased with how it’s turned out and just makes it feel like such a different space - almost bigger even though it clearly isn’t any bigger..?!
Hairwashing hasn’t been such a chore at the moment, and funnily enough even just changing the shower head, we’re able to have hotter water (the old shower package only went a certain way round to hot so it wasn’t exactly hot…), and of course the water is contained with the screen meaning that trips to the toilet aren’t quite as wet anymore! BONUS.
And of course, I couldn’t not add in a spot of greenery, especially knowing that these plants love the humidity and the light which felt like the perfect spot for them.
Anyone wanna come round for a loo break? Our door sure is open…!
*I was kindly offered a press discount on the Porcelain Superstore tiles in exchange for a mention. All views and photographs are my own.
